Generating a Location Image
Location image generation combines an image attached to a touring post or quick post with the map information to create a stylish image with a map. It’s handy when sharing a route or spot on social media.
Which Posts Can Use It?
| Post type | Supported |
|---|---|
| Touring Post | ✅ Supported |
| Quick Post | ✅ Supported |
| Gadget Info | — Not supported, since it has no map feature |
In addition, the source image must be registered to a spot on the map.
You can only generate from your own posts. You cannot generate from other users’ posts.
Opening the Location Image Screen
Tapping the photo icon on your own published post card or detail page opens the location image screen.
If you open this screen directly, you can start from “Generate from the created content list” or “Create a post.”
Screen Layout
On a smartphone, the preview is at the top of the screen and the adjustment panel at the bottom. On a computer, the preview is on the right and the adjustment panel on the left.
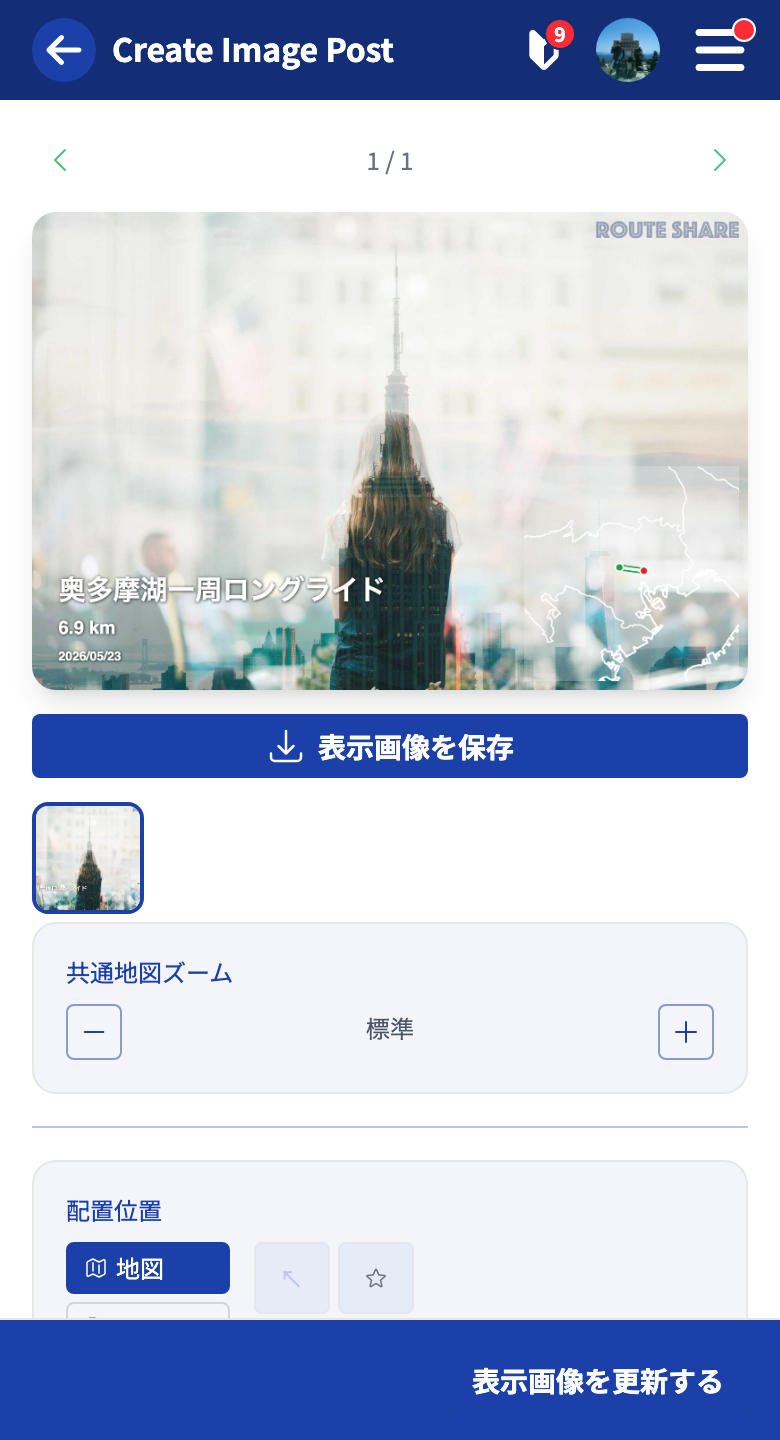
When it opens, several variations are generated automatically and lined up in the preview. Tap a thumbnail to switch, choose your favorite, and then fine-tune it.
What You Can Adjust
Common Map Zoom
Adjust the breadth of the map, shared across all images. Wider shows more of the surrounding geographic information; narrower zooms in around the spot.
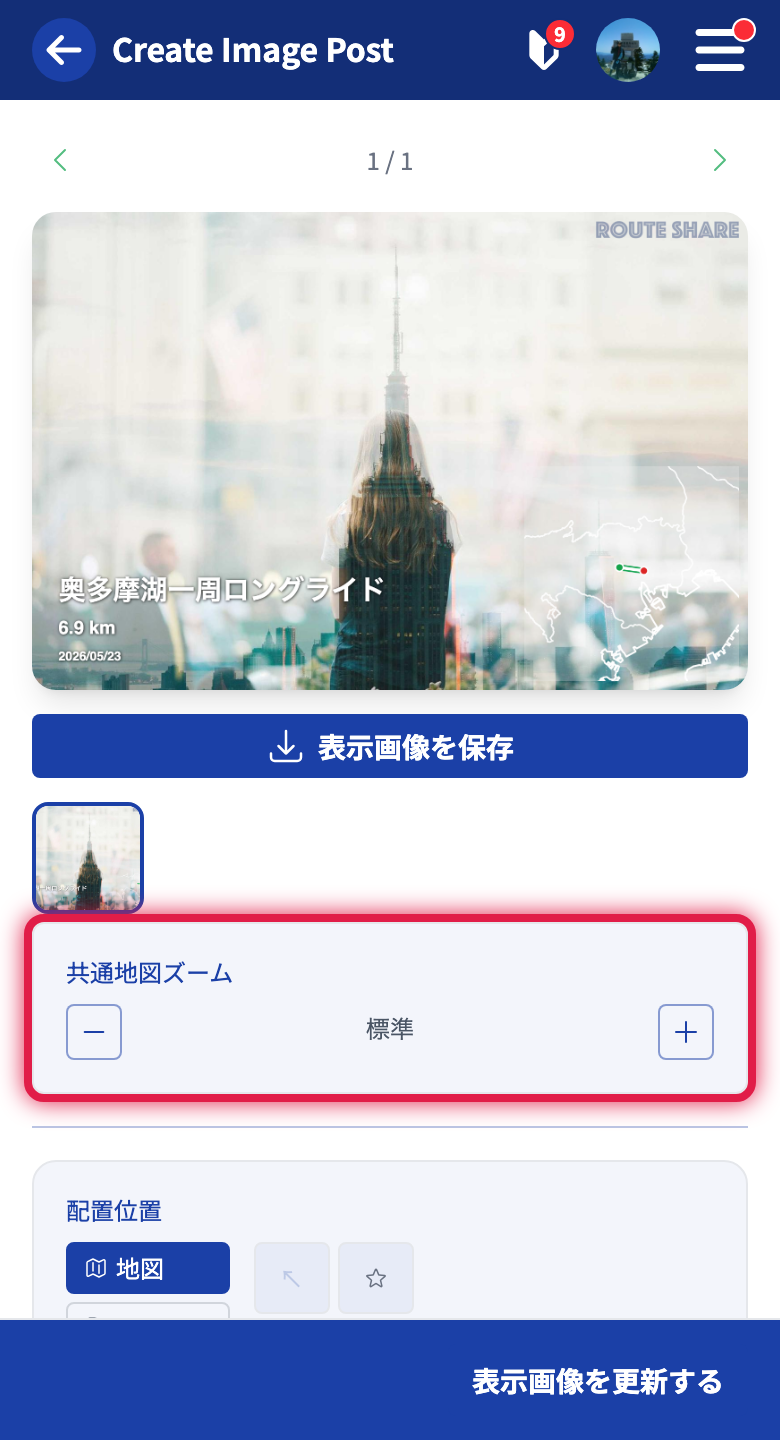
| Control | Behavior |
|---|---|
| Wider | |
| Standard | The original zoom |
| Narrower |
Placement Position
You can choose where to place the map, text, and logo on the image — top-left, top-right, bottom-left, or bottom-right.
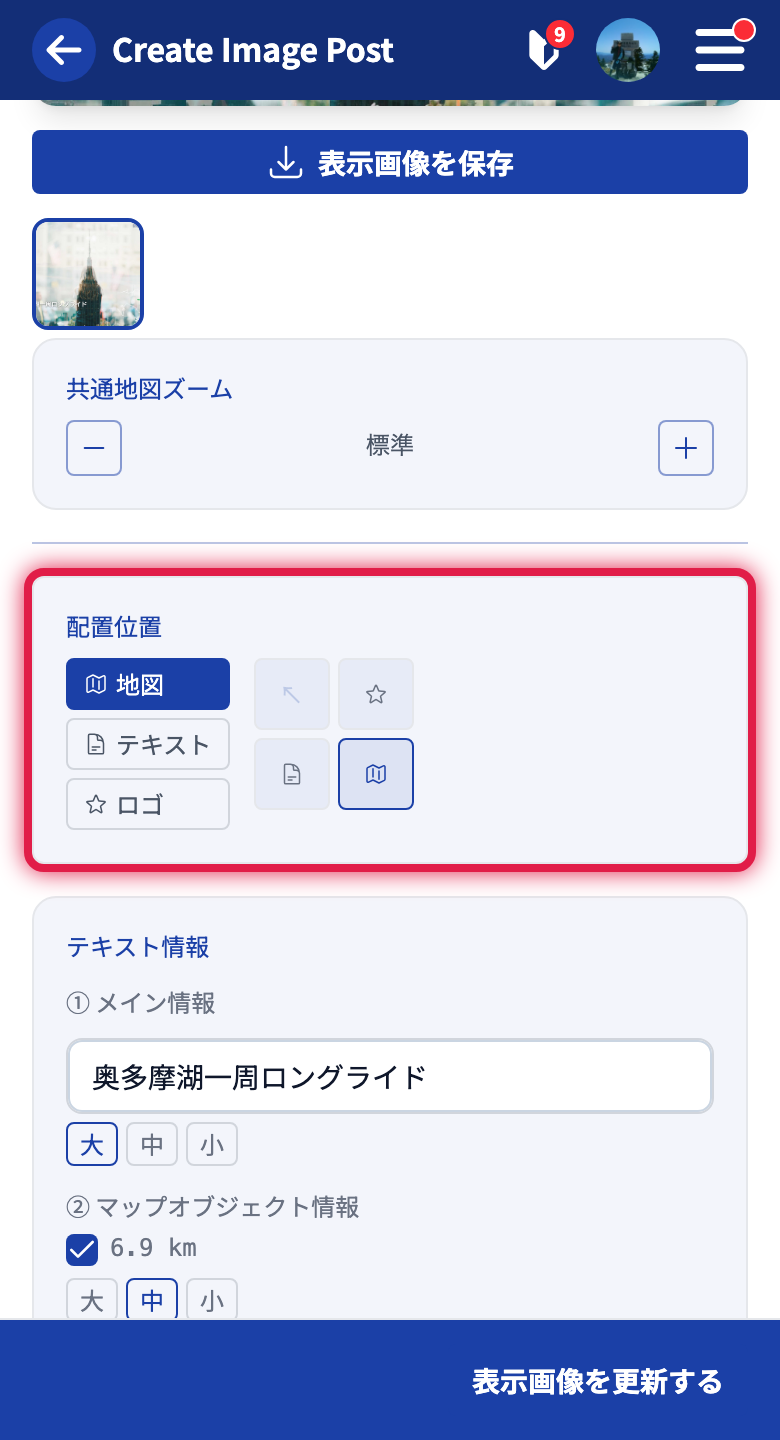
- The position to overlay the map
- The position to overlay the text
- The position of the source logo
Since you can place the three separately, you can arrange a composition that doesn’t get in the way of the photo’s subject.
Text Information
You can set text to overlay on the image in three lines.
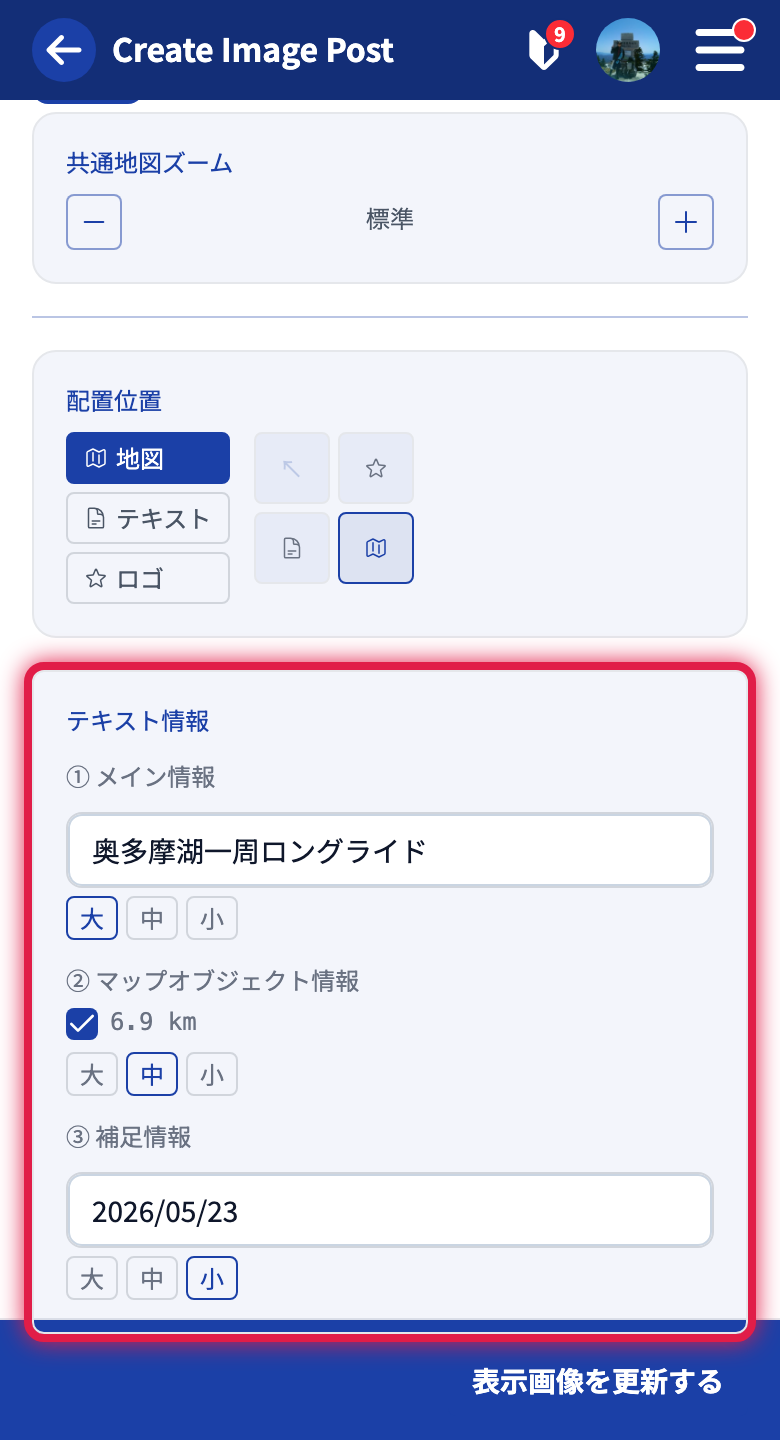
| Line | Example |
|---|---|
| ① Main info | Title or spot name (larger) |
| ② Map object info | An automatically calculated description. Available only when exactly one map object is selected |
| ③ Supplementary info | A modest line of text such as a date (e.g., 2023/07/01) |
For each line, you can choose a font size of large / medium / small. If you leave a line blank, it is not shown.
Map Objects to Show
Use the checkboxes to choose which spots, lines, and so on are shown on the map. They are grouped by layer.
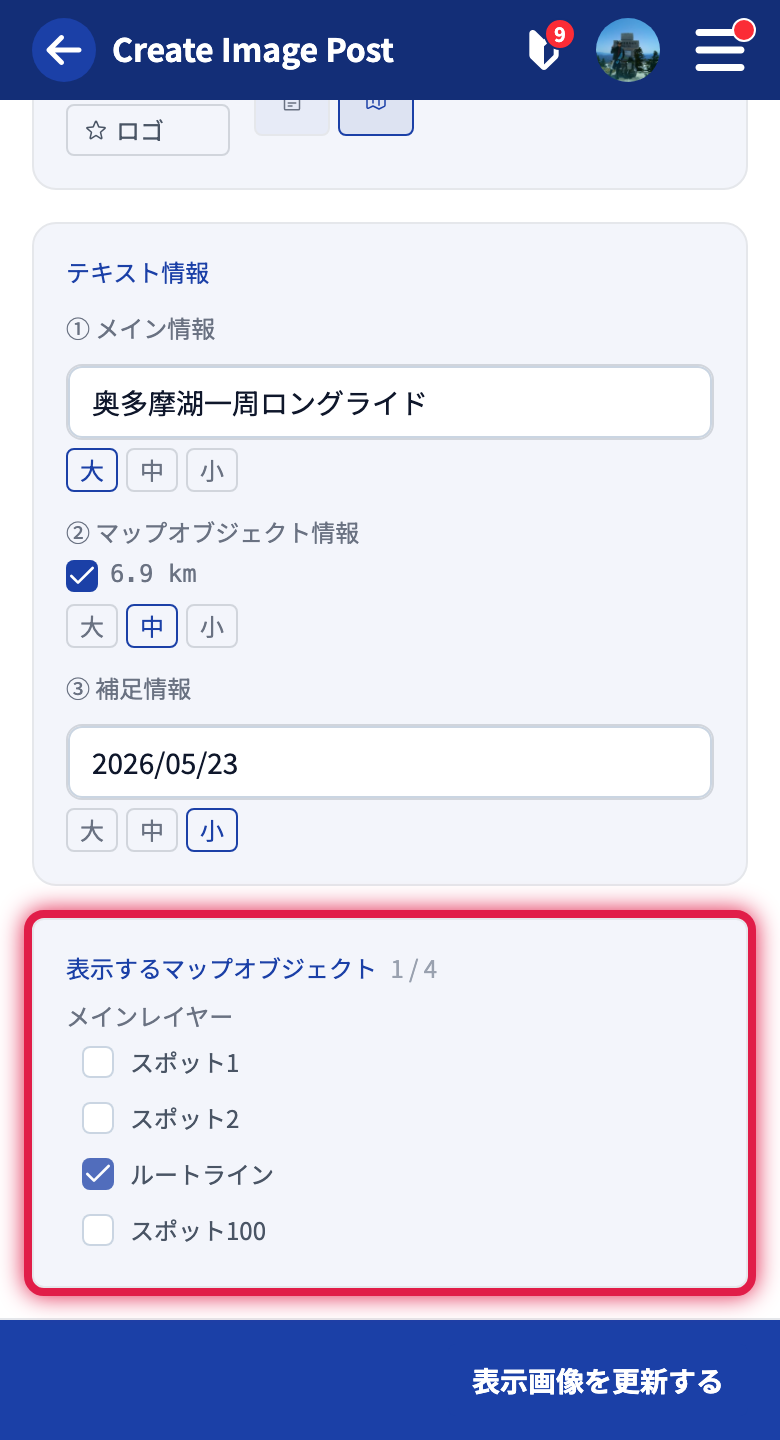
- The number of objects shown / the total is shown at the top.
- You must show at least 1.
- Map objects with an attached image show an image mark.
Applying Settings and Regenerating
Adjustments are not reflected in the image immediately. Tapping “Update displayed image” at the bottom of the screen applies them only to the image currently shown.
Switching to a different thumbnail loads that variation’s settings into the panel.
Saving the Image
When an image you like is shown, tap “Save displayed image” to save it to your device.
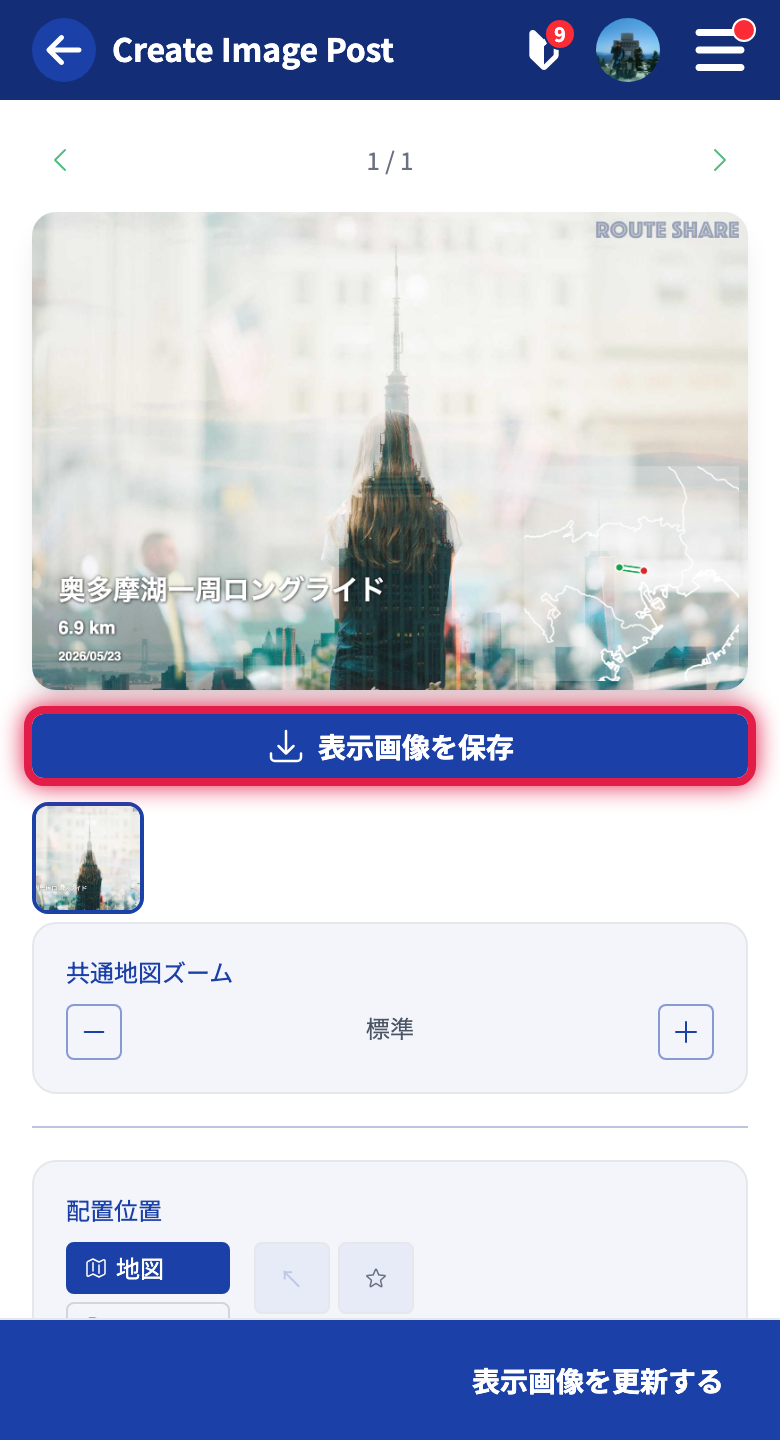
- Browser version: saved to your downloads folder
- App version: saved to your camera roll (photos app)
You can use the saved image directly for social media posts and the like.
Tips
- Registering multiple photos to a spot makes it easier to get more variations.
- A short catchphrase in the main info looks great (words rather than long sentences).
- Even with the same post, you can create a different image each time you change which objects are shown.
Tutorials
- Quick Start
Getting started with RouteShare
- Explore
List, map, and article views
- Account
Sign up, login, profile, settings
- Create
Quick posts, touring posts, gadget articles
- Planning
Create, share, and copy touring plans
- Tracking
Recording and editing tracks
- Teams
Create and join teams, team posts and chat
- Actions
Likes, comments, follows
- Manage
Managing your posts