Importing Records
This page explains how to import a trail you recorded in the app into the map of a quick post or touring post. For how to make recordings, see Recording and managing.
Records are saved by date, and you can import any date, current or past. You can import the same record into different posts, or create multiple posts from a single recording.
Importing a Record into the Map
1. Open the Post’s Map
Create a quick post or touring post and open the map from the Geographic Info tab. For the basics of the map editor, see Using the map editor.
2. Open the Record Import
Tapping Import record in the action buttons opens the screen for choosing a record.
3. Choose the Record for the Date You Want
Pressing the date button opens a calendar. Only dates with a record can be selected. You can move to the previous or next recording date, and step through years and months.
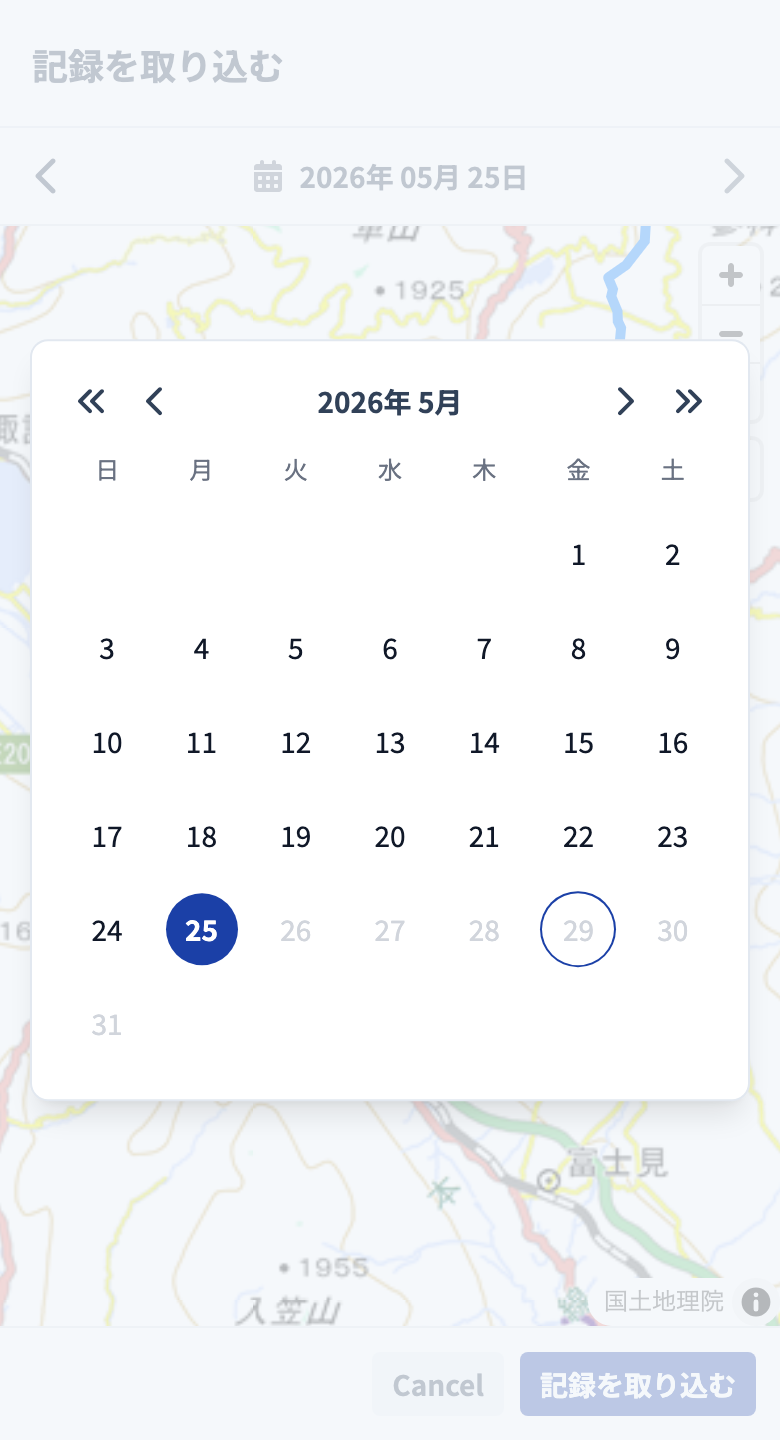
When you choose a date, that day’s trail is shown on the map. Check the content and tap Import record.
4. It Is Added as a Recording Line
The imported trail is added to the map as a recording line. After that, tidy up the unwanted sections, add your body text, and publish.
Removing Unwanted Sections
A tracking record may include privacy-sensitive locations such as your home or nearest station. With a recording line, you can remove such sections.
A recording line is the trail you actually walked or rode. You can edit sections (delete them or keep only a section), but you cannot add or move points to change the route itself, as you can with an ordinary line or a navigation line.
1. Select the Recording Line
Tap the recording line on the map to select it.
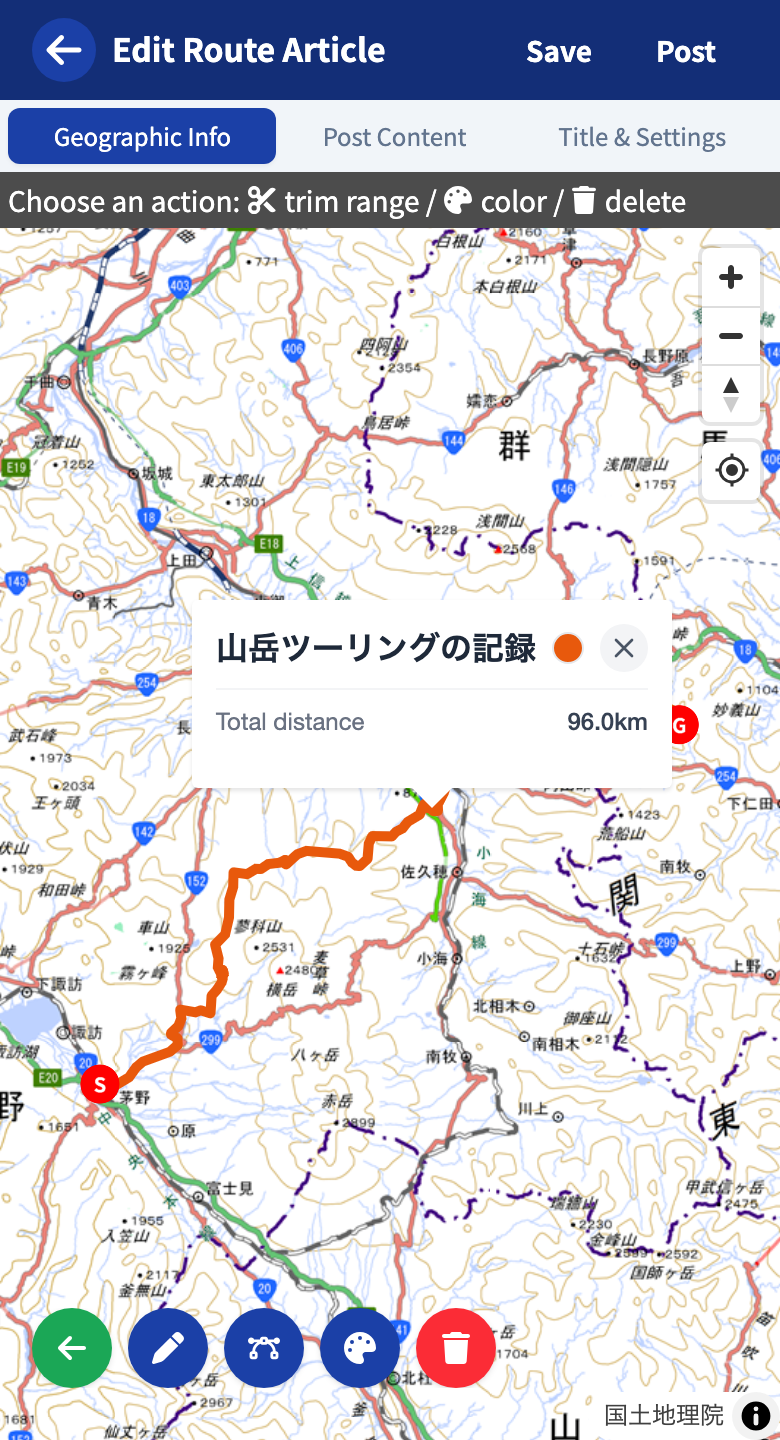
2. Enter Section Editing
Tapping section editing in the action menu switches to a mode for specifying a section.
3. Specify a Section
Tap the line to choose a start and end point, or adjust with the slider at the bottom of the screen. The chosen section is shown in color.
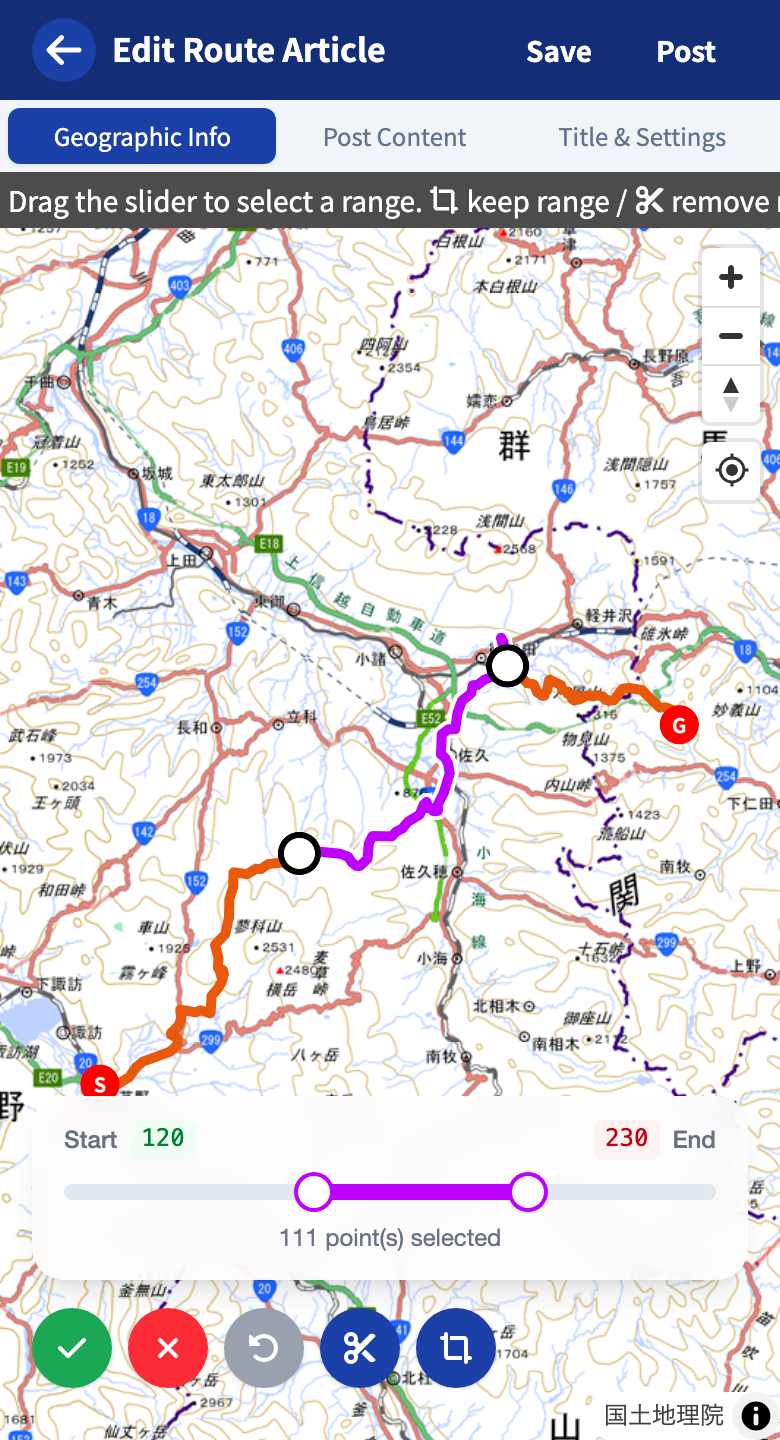
4. Delete a Section / Keep Only a Section
Delete section — removes the chosen section. The surrounding parts connect.
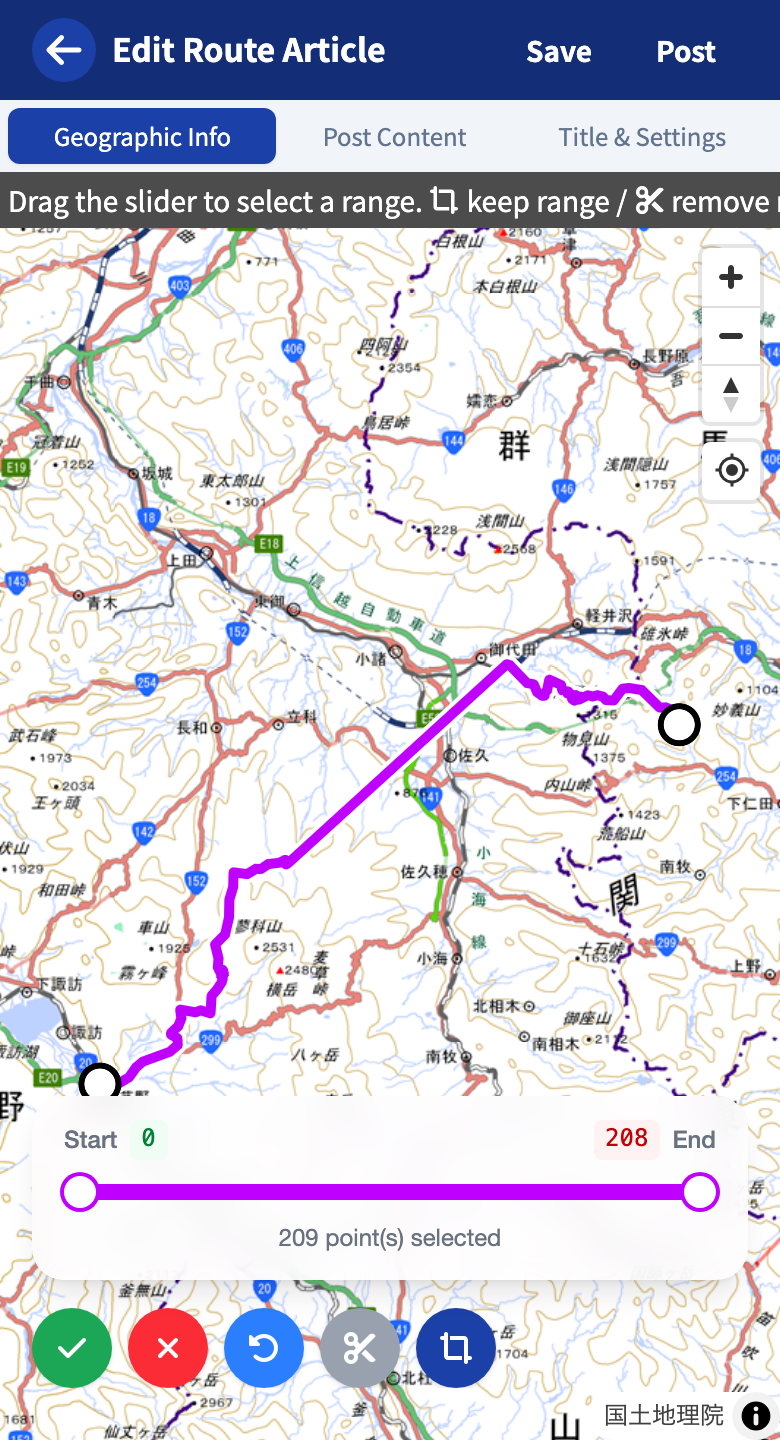
Keep only the section — keeps only the chosen section and removes the surrounding parts.
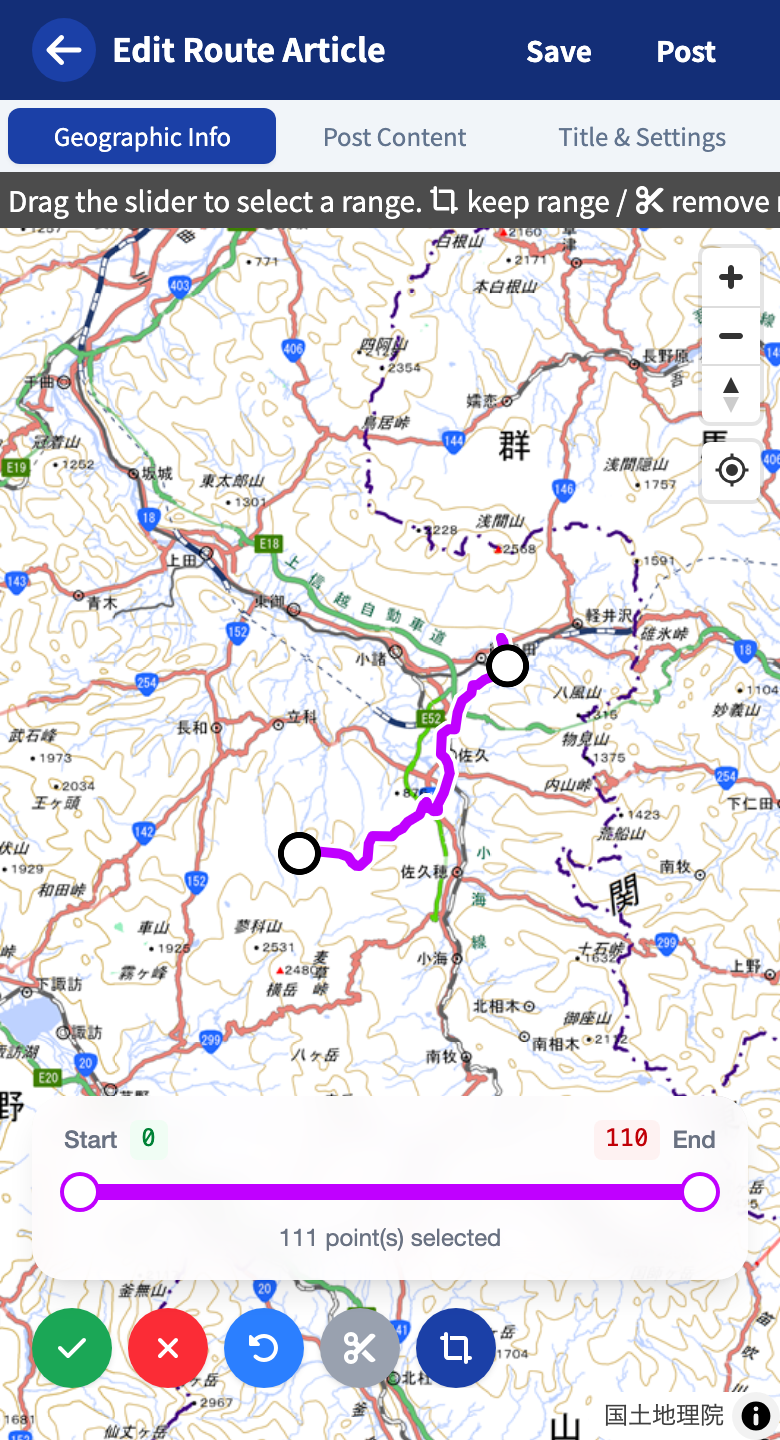
Undo lets you go back one step.
5. Confirm or Cancel the Changes
When you’re done tidying up, confirm with . To stop, discard all changes with .
Tips for Tidying Up
Tidy Up the Start and End Points
When the start or end point is somewhere you don’t want to show, such as your home or nearest station, delete the section that includes it.
Tidy Up Zigzag Sections
Because of GPS accuracy, a trail can zigzag in fine detail. Deleting that section tidies up the line.
Always Check Before Publishing
A record is never published all of a sudden. Always do a privacy check before publishing a post that includes a recording line.
- Whether the start or end point includes your home or nearest station
- Whether the places you stopped at include somewhere that could identify an individual
Once you’ve checked, see Article settings and publishing to publish.
Tutorials
- Quick Start
Getting started with RouteShare
- Explore
List, map, and article views
- Account
Sign up, login, profile, settings
- Create
Quick posts, touring posts, gadget articles
- Planning
Create, share, and copy touring plans
- Tracking
Recording and editing tracks
- Teams
Create and join teams, team posts and chat
- Actions
Likes, comments, follows
- Manage
Managing your posts