Creating a Touring Post
A touring post is a post for introducing a trip or ride in detail with a map and text. It is RouteShare’s central post type and the most full-featured of the three post types.
Choosing the Post Type
Tap “Create” at the bottom of the screen. A screen for choosing the post type opens; choose Touring Post here.
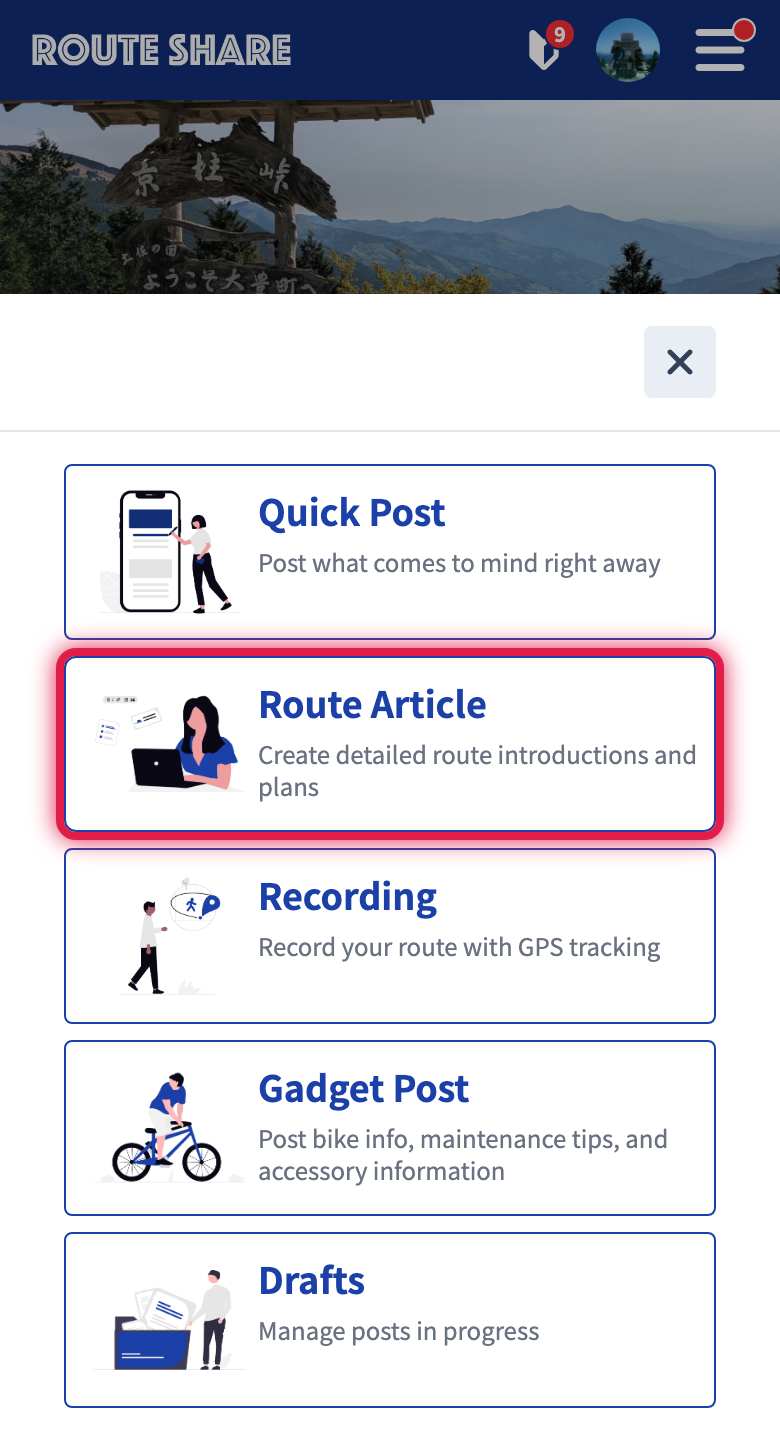
| Type | Difference |
|---|---|
| Touring Post | A full-fledged article made with a map, text, and photos. Explained on this page |
| Quick Post | A quick post with short text and photos. See Creating a quick post |
| Gadget Info | A gear review. See Creating gadget info |
The Editor’s Structure
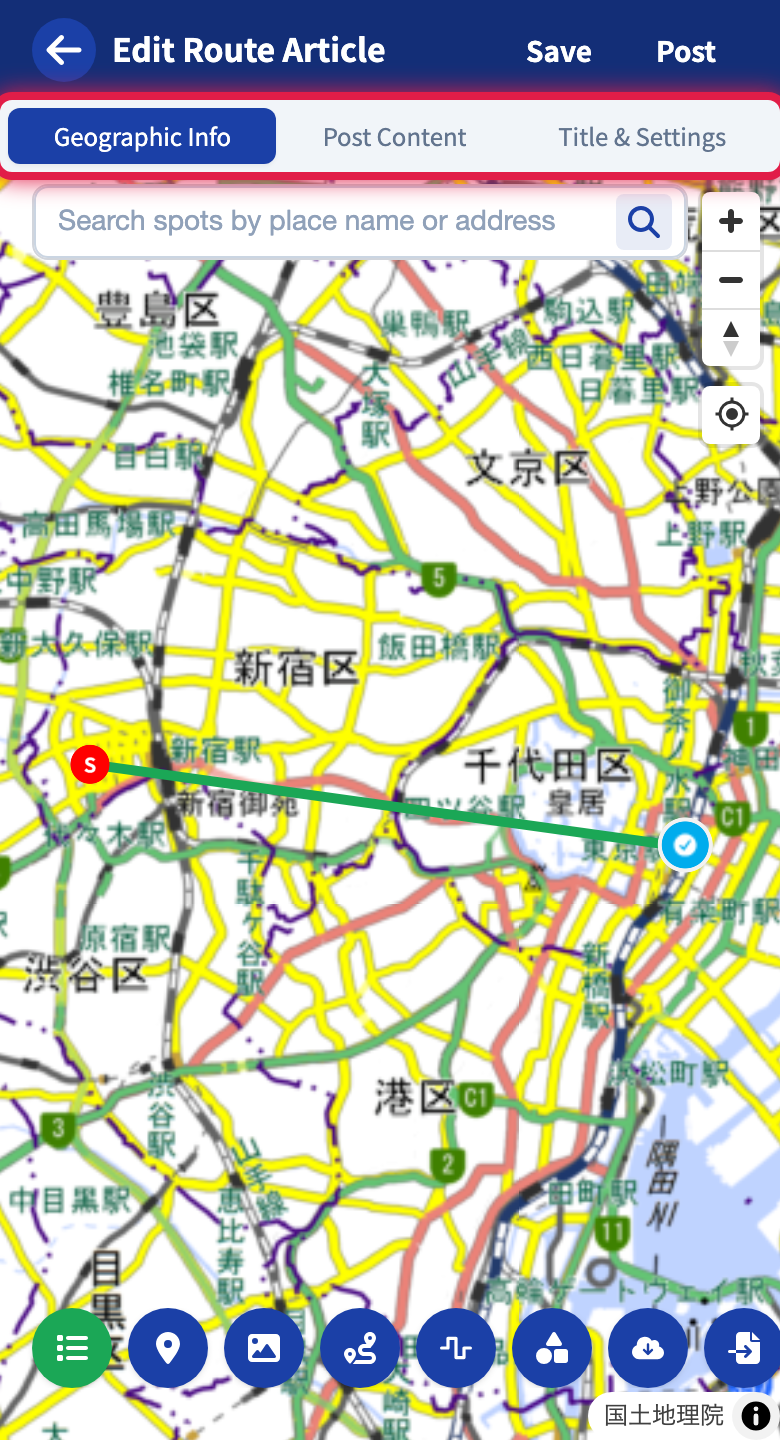
The touring post editor consists of three tabs: “Geographic Info,” “Post Content,” and “Title & Settings.”
Post Content Tab
Enter the body. With the rich text editor, you can use a variety of formatting such as headings, bullet lists, images, links, and map links. A map link is a tie that guides readers from text or an image in the body to a spot or line on the map, and you can also create a new spot on the fly and tie it.
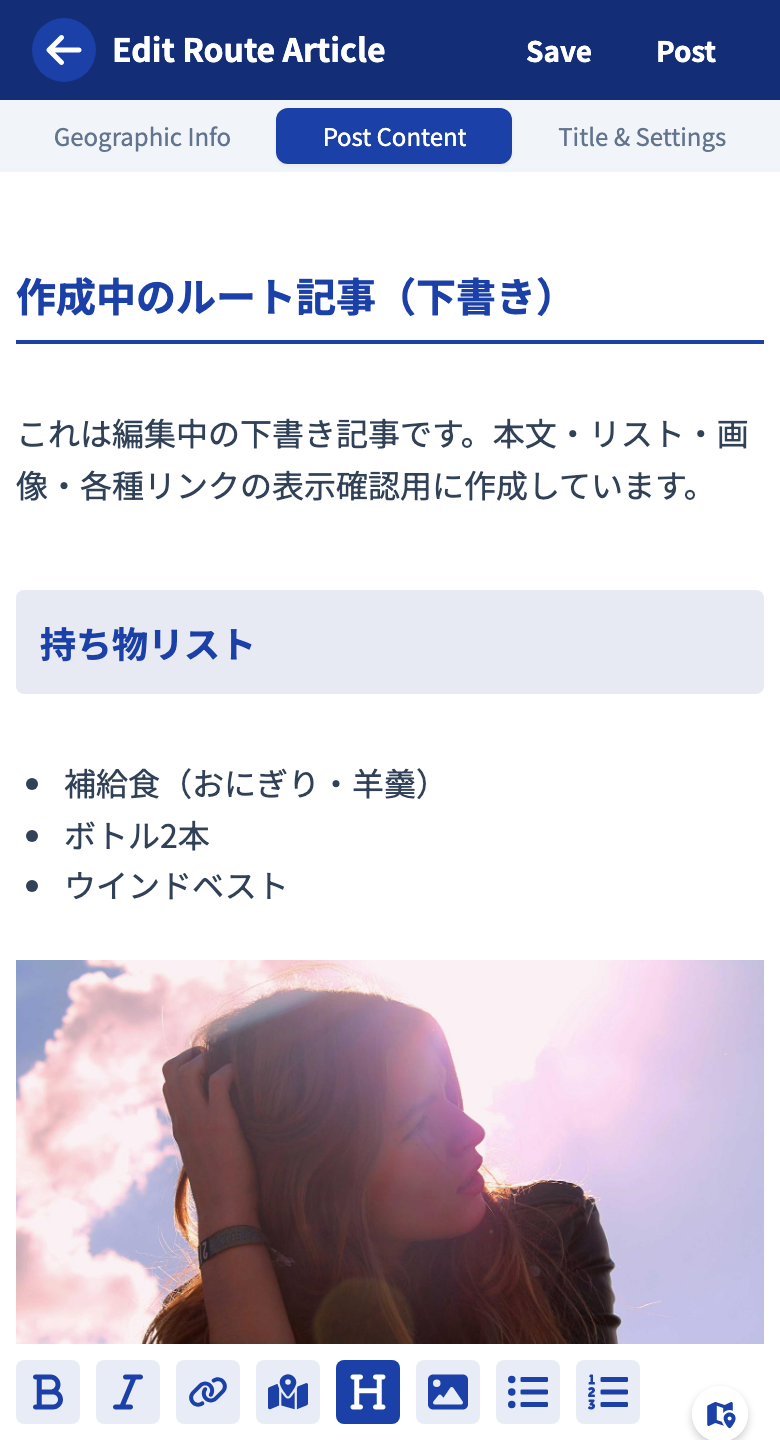
For detailed operations, see Using the rich text editor.
Geographic Info Tab
Place spots, lines, navigation lines, shapes, and more on the map.
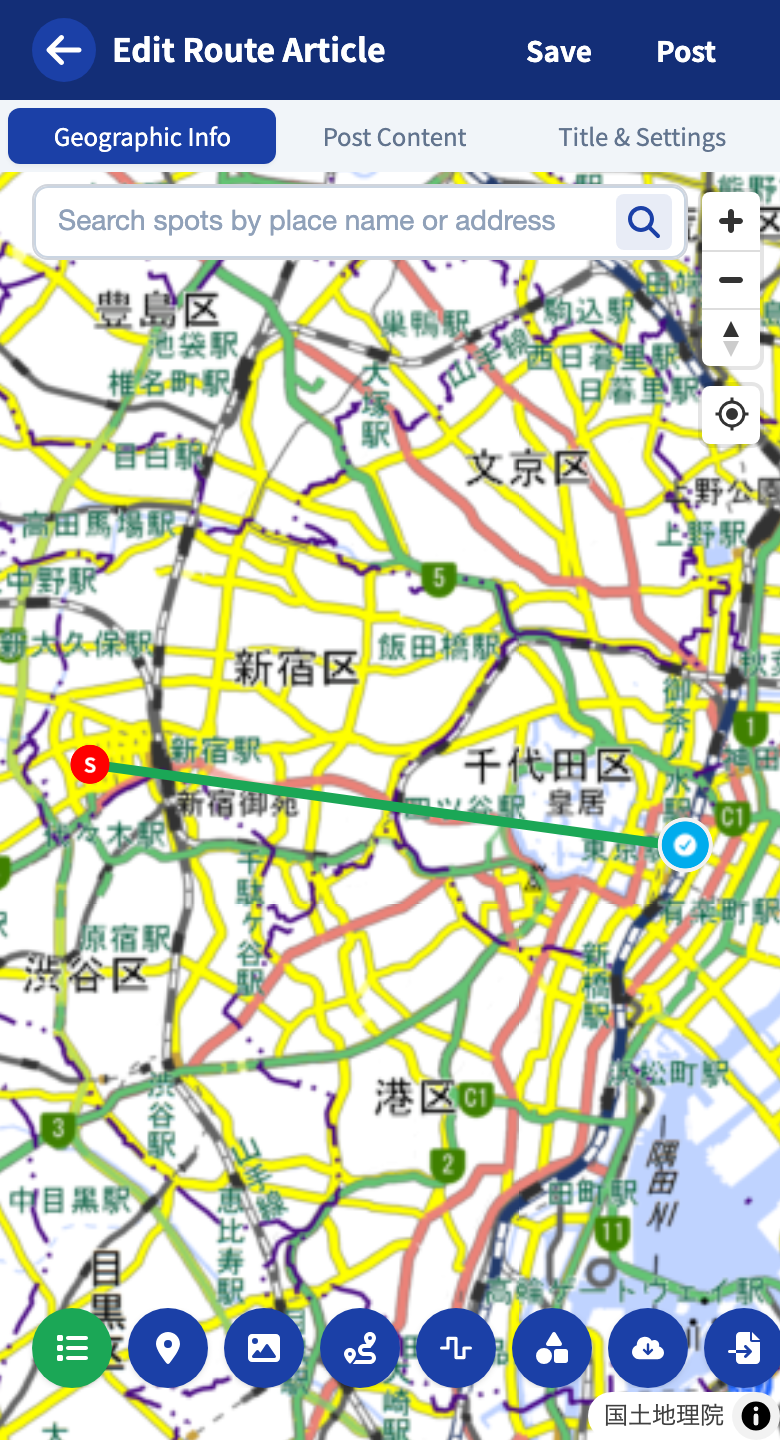
For detailed operations, see Using the map editor.
Title & Settings Tab
Set the title, thumbnail, tags, and publish settings.
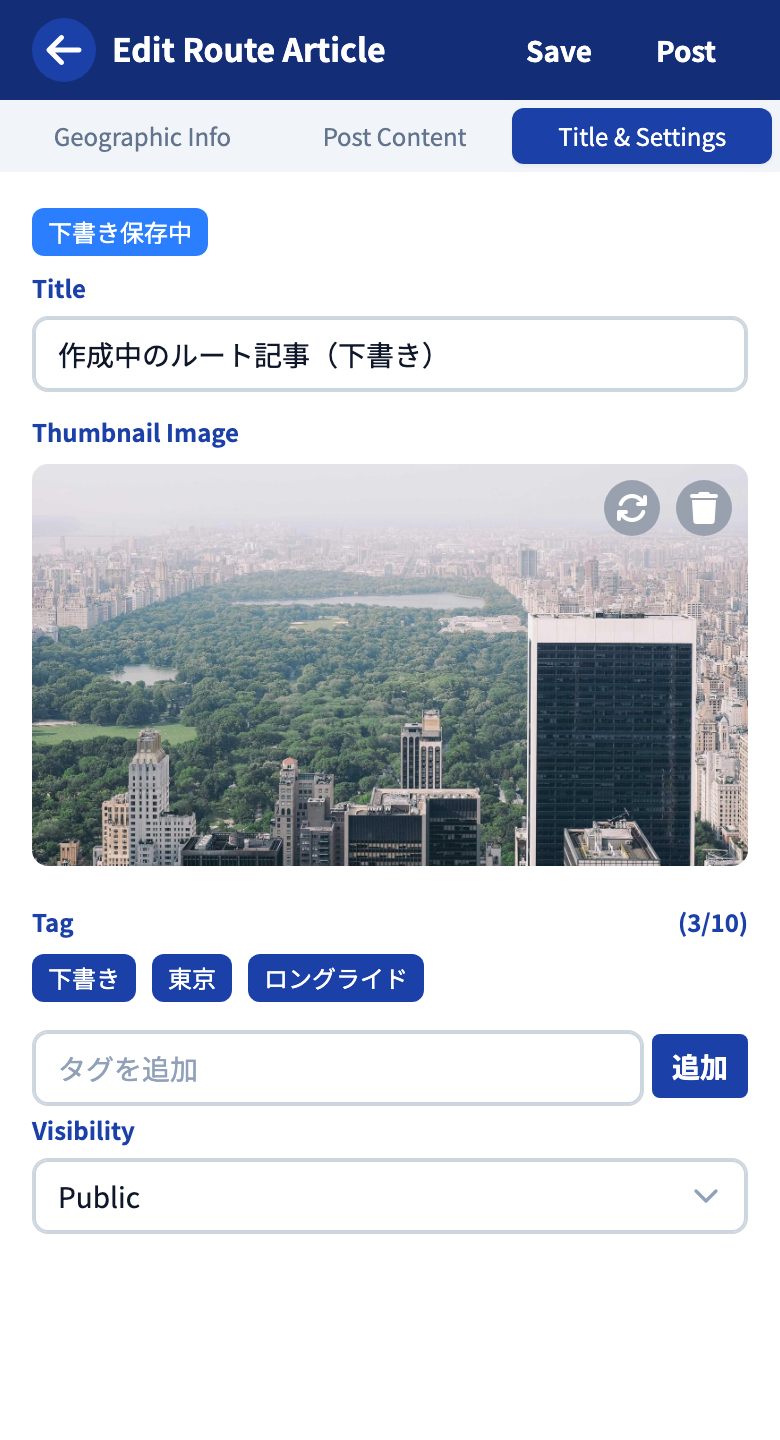
Publish Settings
Choose how it is shown when published.
| Setting | Details |
|---|---|
| Public | Anyone can view it |
| Limited by URL | Only people who know the URL can view it. It does not appear in lists or search |
You can have up to 10 articles per user set to limited-by-URL.
Tags
Adding tags makes your article easier to find from tag pages and search. Try registering place names, prefectures, events, road names, and so on.
- Up to 10 per post
- Up to 15 characters per tag
Enter a tag name and “Add” to register it, and tap a tag to remove it.
Thumbnail
You can set any image as the thumbnail. Once set, it is shown as a card in lists and on your profile.
The Flow to Completion
- Write the outline of the body on the Post Content tab.
- Place spots and routes on the Geographic Info tab, and reference them from the body with map links.
- Check the title, thumbnail, tags, and publish settings on the Title & Settings tab.
- Tap “Save” to keep it as a draft, or “Post” to publish.
Drafts kept with “Save” are visible only to you. Even after publishing, you can apply edits with “Update,” and temporarily make it private with “Return to draft.” You can open created articles from “Created content” on My Page, and drafts from “Drafts.”
After Publishing: Share with a Location Image
If you register an image to a spot on the map, you can generate and share a location image after publishing. Start from the photo icon on the post card. For details, see Generating a location image.
Tutorials
- Quick Start
Getting started with RouteShare
- Explore
List, map, and article views
- Account
Sign up, login, profile, settings
- Create
Quick posts, touring posts, gadget articles
- Planning
Create, share, and copy touring plans
- Tracking
Recording and editing tracks
- Teams
Create and join teams, team posts and chat
- Actions
Likes, comments, follows
- Manage
Managing your posts