Using the Rich Text Editor
RouteShare’s rich text editor is a tool for building your body text by adding formatting and inserting images and map links. It is used in common when creating touring posts, quick posts, and gadget info, and the available features change by post type.
Differences by Post Type
| Feature | Touring Post | Quick Post | Gadget Info |
|---|---|---|---|
| Paragraph | ✅ | ✅ | ✅ |
| Heading (1–6) | ✅ | — | ✅ |
| Bullet / numbered list | ✅ | — | ✅ |
| Image | ✅ | ※ Separately via the quick post image slider | ✅ |
| Bold / italic / link | ✅ | ✅ | ✅ |
| Map link | ✅ | ✅ | — Not available for gadget info |
A map link is a tie that guides readers from text or an image in the body to a spot or line on the map. Besides choosing an existing spot or line, you can also create a new spot on the fly and tie it. For details, see Adding a Map Link.
Quick posts cannot insert headings, lists, or images, and offer simple editing with only bold, italic, links, and map links. For details, see Creating a quick post.
Using the Toolbar
The editor has a toolbar with an independent button for each feature. On mobile, it is fixed above the keyboard.
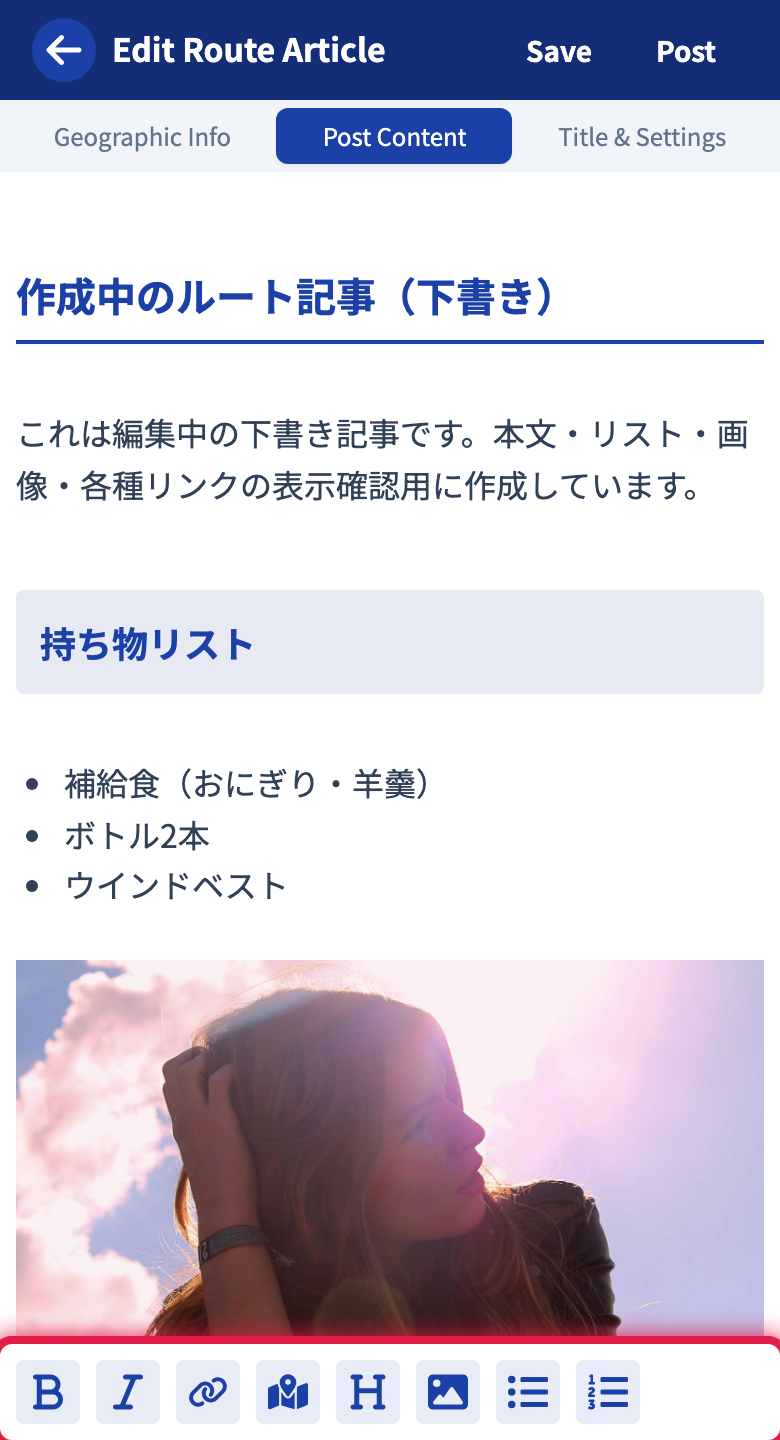
| Button | Behavior |
|---|---|
| Bold | Make the selected text bold |
| Italic | Make the selected text italic |
| Link | Open the screen for entering a URL |
| Map link | Tie a spot or line on the map to the selected text or image. Not shown for gadget info |
| Heading | Choose heading level 1–6 from the menu that opens |
| Image | Choose an image from the file picker, upload it, and insert it (multiple can be selected at once) |
| Delete image | Shown while an image is selected. Tap to delete |
| Bullet list | Switch to a bullet list |
| Numbered list | Switch to a numbered list |
Entering Text
Tap the body input area and type. With text selected, tapping bold / italic / link / map link on the toolbar adds formatting to the selected range.
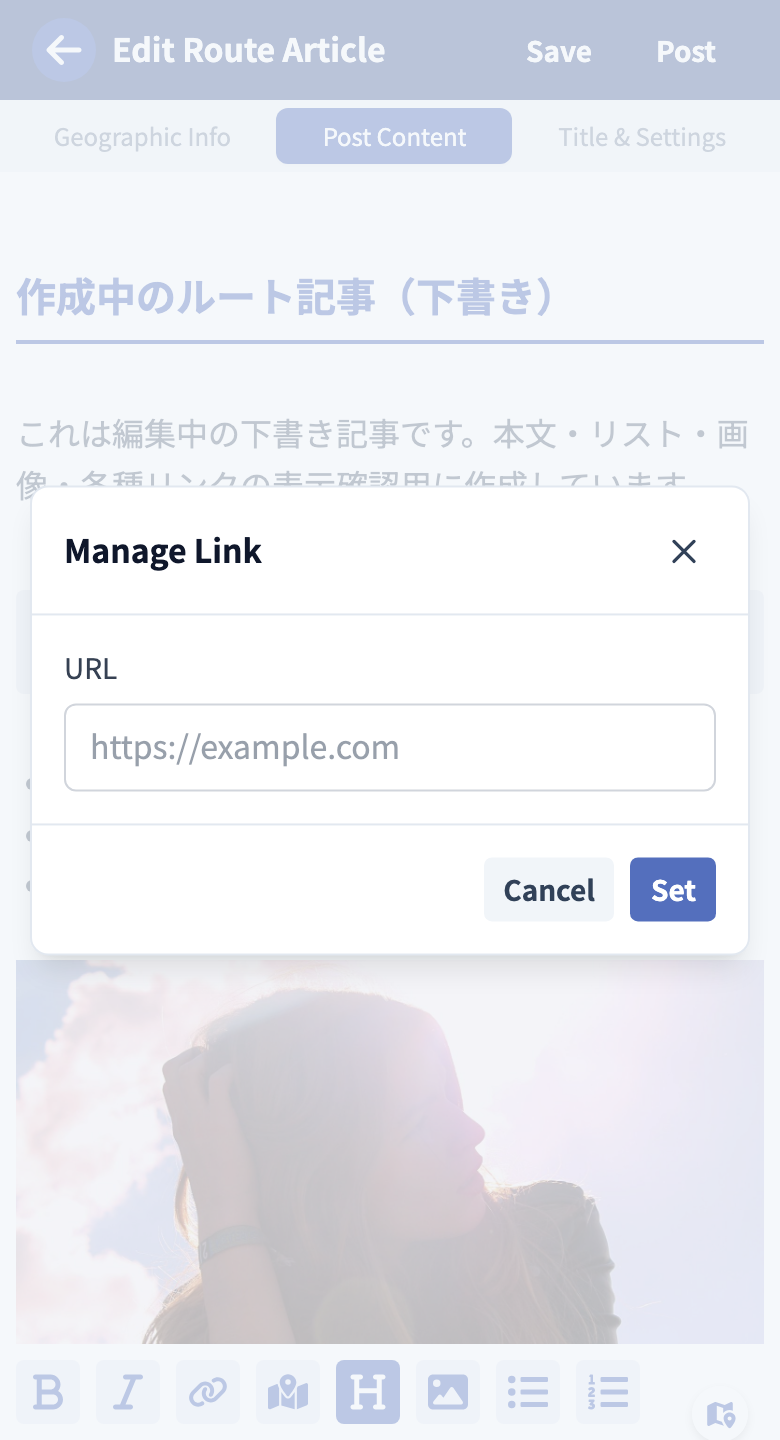
Tapping the link button opens the screen for entering a URL.
Using Headings
Tapping the heading button on the toolbar opens a menu where you can choose heading 1–6.
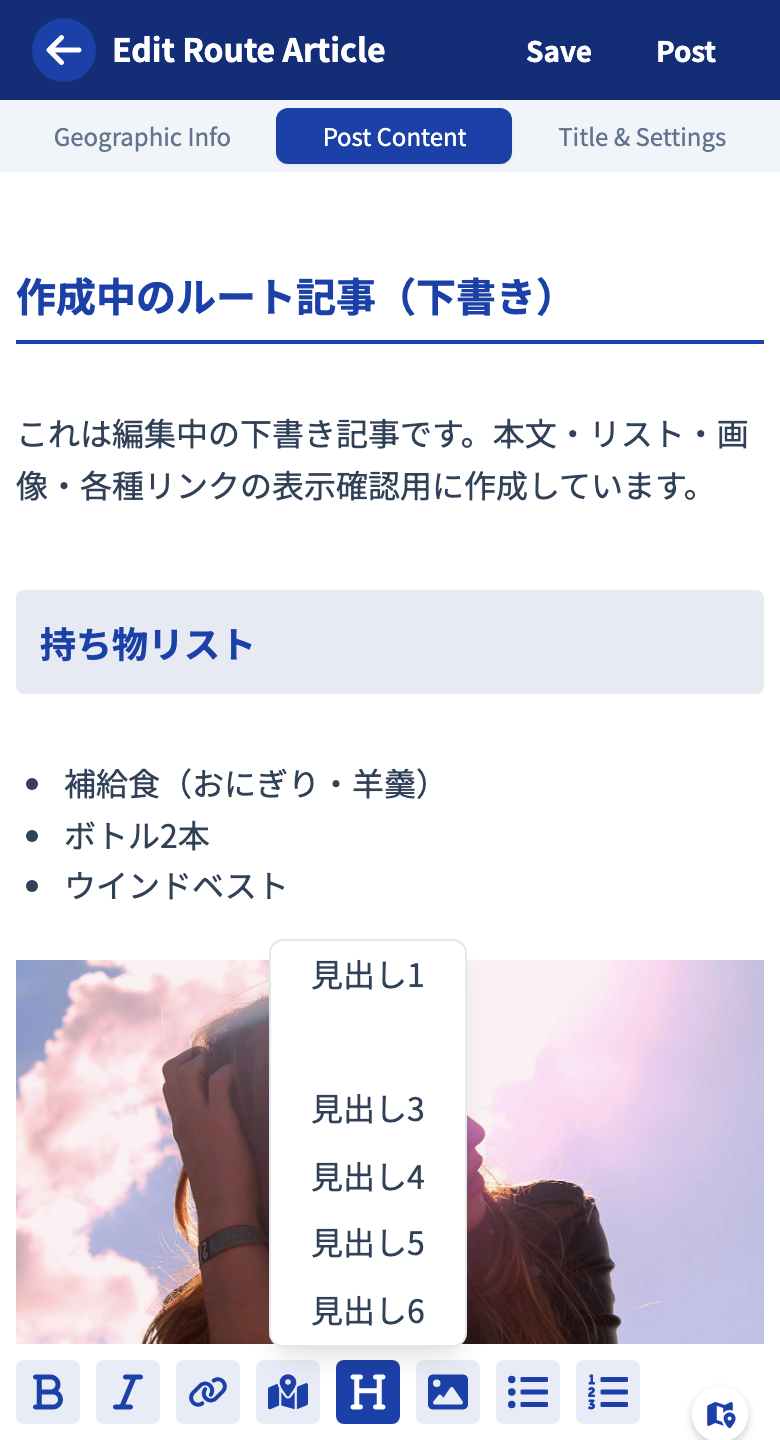
The paragraph where the cursor is switches to the chosen heading level. Use it to structure your body and make it easier to read.
Lists
Tapping bullet list or numbered list on the toolbar switches the current paragraph to a list.
Inserting Images
Tapping the image button on the toolbar opens your device’s file picker. The chosen image is uploaded as is and inserted into the body.
- You can select multiple images at once. As many as you chose are inserted in a row as individual images.
- Each chosen image is uploaded and inserted every time.
When you tap an inserted image to select it, the image button switches to a trash button, and you can delete that image.
There is no display that arranges multiple photos together in one frame. When you want to line them up, insert images one by one. For posts centered on short text, the quick post image slider is also handy.
For image upload specifications, see Uploading image files.
Adding a Map Link
To add one to text, select the text; to add one to an image, select the image; then tap the map link button on the toolbar. In touring posts you can add map links to both text and images, and in quick posts to text and the photos in the image slider.
If no map link is attached yet, a menu for choosing how to add one opens.
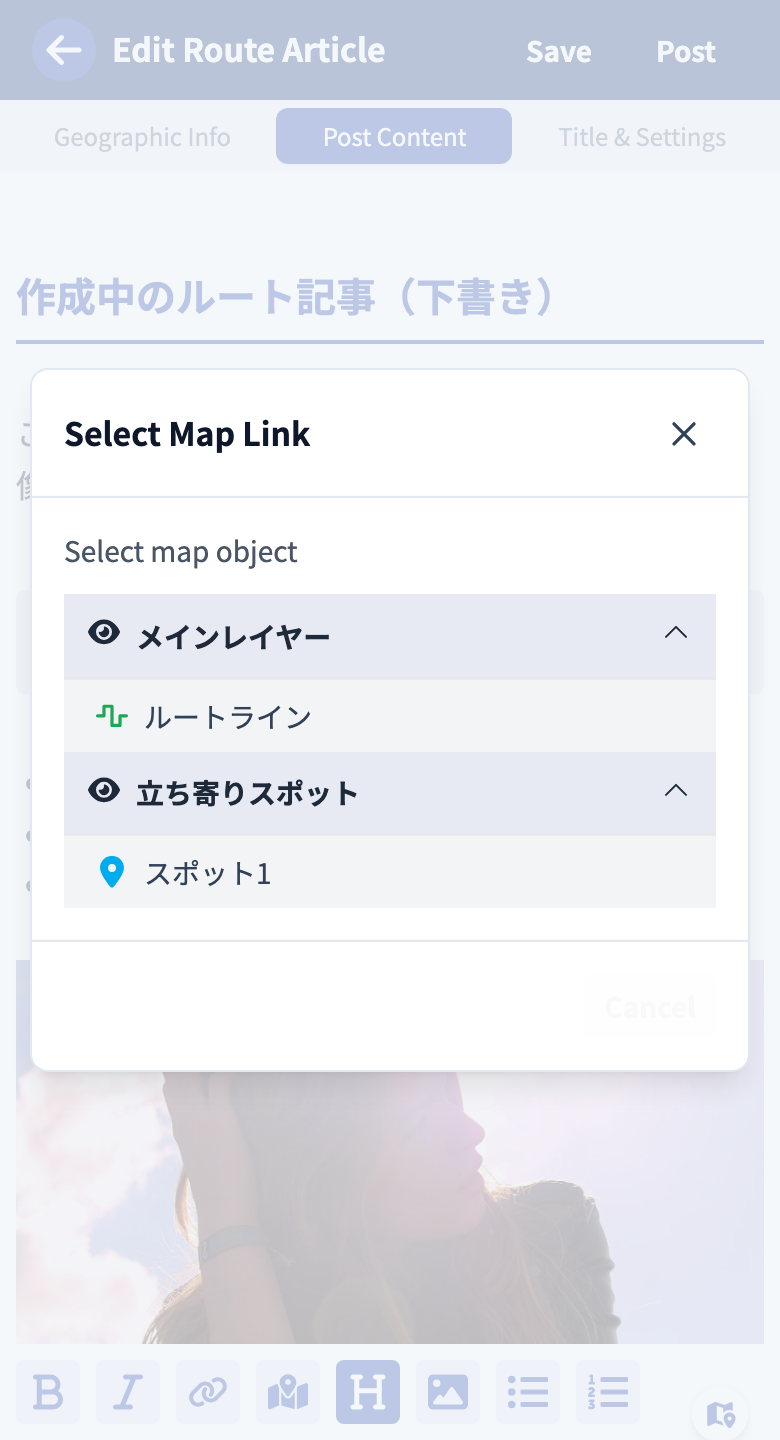
- Select an existing map object — Choose from the spots and lines already created on the geo info map and tie it.
- Create a spot at your current location — Create a new spot where you are now and tie it right away.
- Create a spot by choosing a location on the map — The map opens; tap the place you want to tie and a new spot is created there.
Created spots are added to the geo info map. A spot created from text is named after the selected text, and a spot created from an image gets that photo attached. You can edit the spot’s name and description on the geo info map at any time.
For text or images that already have a map link, the “Select Map Link” screen opens, where you can switch to another spot or line or remove the map link.
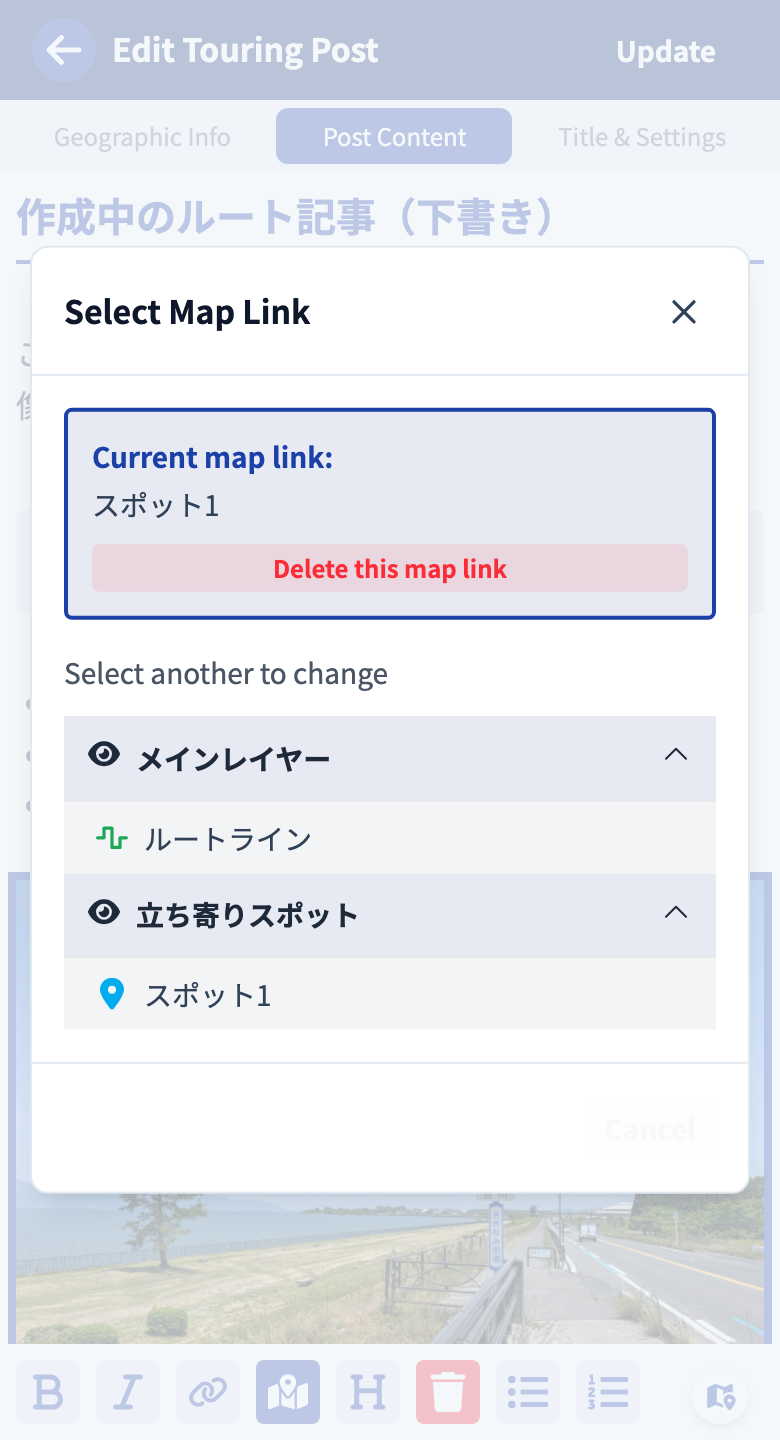
When a reader taps text or an image with a map link, the corresponding place on the map opens. It instantly conveys “where is this photo?”
Tutorials
- Quick Start
Getting started with RouteShare
- Explore
List, map, and article views
- Account
Sign up, login, profile, settings
- Create
Quick posts, touring posts, gadget articles
- Planning
Create, share, and copy touring plans
- Tracking
Recording and editing tracks
- Teams
Create and join teams, team posts and chat
- Actions
Likes, comments, follows
- Manage
Managing your posts