Using Map Editor
How to use Map editor
The map editor allows you to set spots and routes on the map. You can set a spot at any point and include a description or photo of that spot, or you can lay out a route along a road and set colors and descriptions. Here we call the things you add to the map "objects".
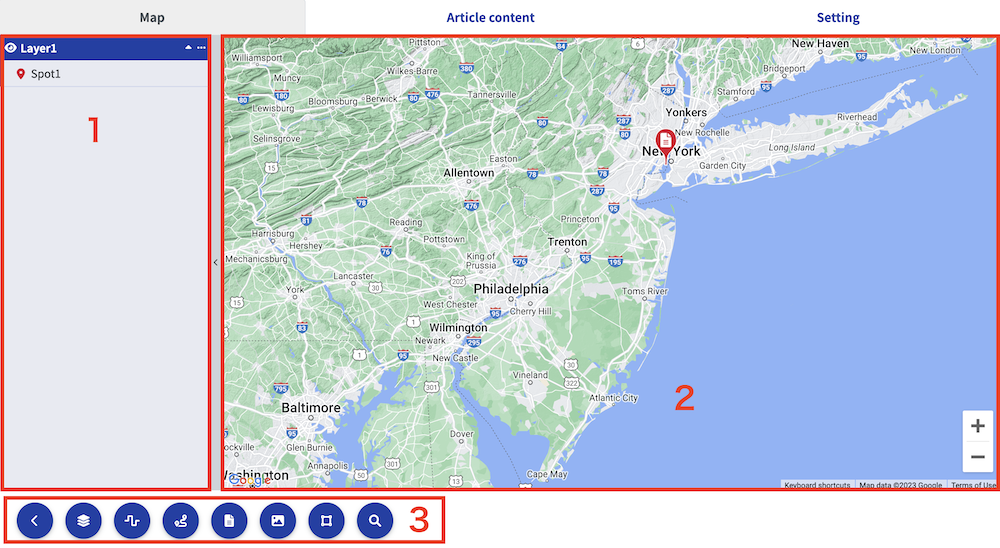
The map editor consists of three locations: 1. Layer,2. Map,3. Map operation buttons.
When adding content to the map, you can use the
- click on what you want to add with the control button
- click on the map to draw a spot or line to add. Guidance for the spot or line will appear at the top of the map.
- Finally, click the button to confirm the addition. Cancelation is also possible with the button.
These three steps are fundamental.
How to operate the map
The map uses Google Map. Some parts of the map are embedded in the page and therefore differ from the operations performed on the Google Map site.
PC
- To move, drag the map in the opposite direction you wish to move it.
- To zoom, hold down the ctr key (command key on a Mac) and turn the mouse wheel.
- If you are using a trackpad or similar, you can also zoom by using two fingers to widen or narrow the area.
Tablets & Smartphones
- To move, swipe with two fingers in the opposite direction you wish to move the map.
- Zoom in and out by spreading or narrowing two fingers.
About Operation Buttons
The operation buttons have two types of operations: objects to be added to the map or editor operations. Objects can be added to the map: a single spot, a free line, a navigation line along a road, or a shape.
Common button
The following buttons appear when an object is added or changed on the map:
- the decision button. It reflects additions and changes on the map.
- Cancels the addition or change on the map. In the case of a change, it returns to the state before the change.
Opening and Closing Layers
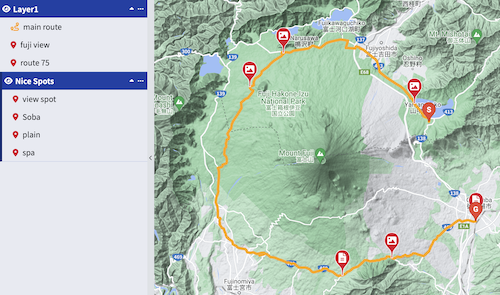
Allows opening and closing of layers. On PC, the left side of the map opens, and on smartphones, a window is displayed on the map. Layers allow you to organize objects. For details on layers, see .
Adding Layers
Adds a new layer. You can create up to 10 layers. Each layer can contain up to 100 objects.
Line
Adds a line to the map. This line can be added to any point on the map and will follow the connected points in order.
If you want to change the position of the start point, end point, or intermediate points, you can freely change them by dragging and moving the white dots.
Finally, click the green button to save the line.
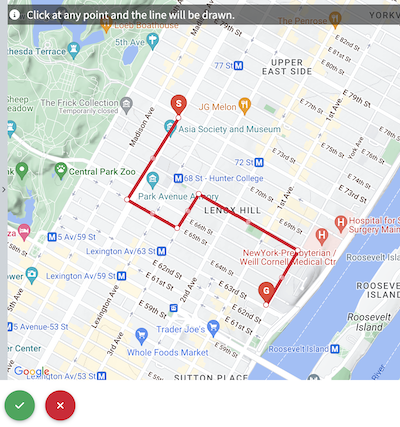
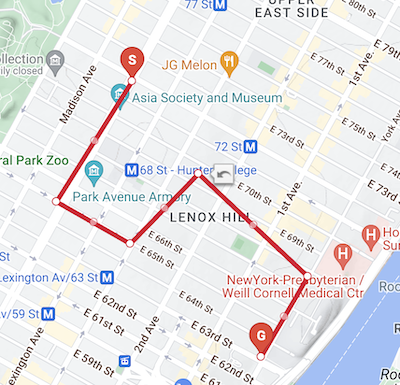
Navigation Line
Adds a navigation line to the map. Set a start point and an end point, and it will search for roads connecting those points and automatically lay the line accurately. You can also set detailed relay points.
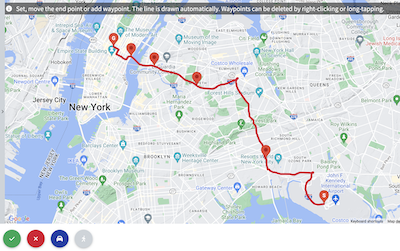
Up to 25 relay points can be set. To delete a relay point, right-click on it on a PC or double-tap on it on a smartphone.
Navigation lines are available for two modes of transportation: "automobile" and "pedestrian" patterns. The best route will be laid out for the mode of transportation.
given to routes that are easily accessible by automobiles, such as highways, freeways, bypasses, and national highways. Trails and areas that can only be accessed on foot will not be laid out. When traveling by car or motorcycle, it is recommended to select "Automobile".
highways, freeways, and other roads that can only be accessed by cars are excluded. It can be laid on national roads, city streets, and trails. You should select "Pedestrian" if you will be laid out on a toll road or if you travel by bicycle or on foot.
For "automobile," priority is given to routes that are easily accessible by automobiles, such as highways, freeways, bypasses, and national highways. Trails and areas that can only be accessed on foot will not be laid out. When traveling by car or motorcycle, it is recommended to select "Automobile".
When "Pedestrian" is selected, highways, freeways, and other roads that can only be accessed by cars are excluded. It can be laid on national roads, city streets, and trails. You should select "Pedestrian" if you will be laid out on a toll road or if you travel by bicycle or on foot.
If you cannot find a route or cannot lay it down well
Navigation routes may not find a pattern to lay down at some set points. In that case, check the following patterns:
- Pedestrians are relatively easier to find than cars and can be laid out in more detail.
- Try to reduce the number of relay points.
- Since the navigation line takes road conditions into account, it may not be searched if there are places where traffic is blocked.
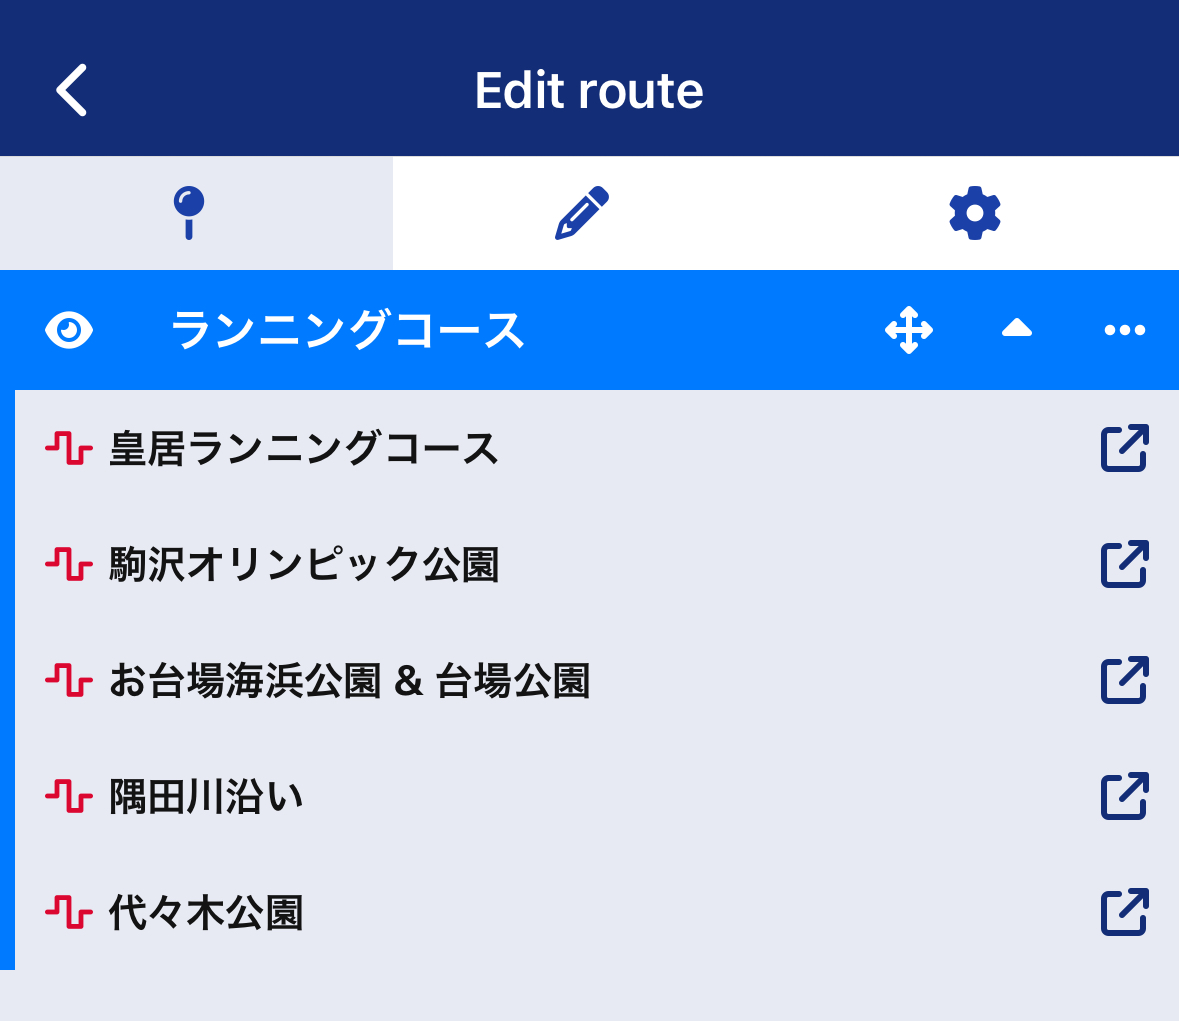
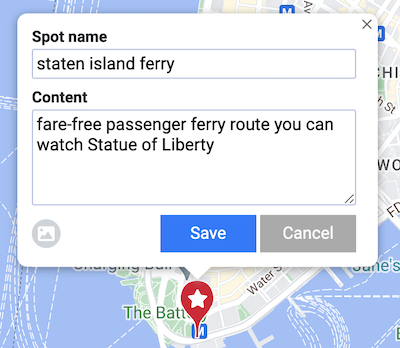
Spot
A spot can be designated at any one location, and a description and photo of the spot can be posted. The spot can also be dragged to change its position.
Text Spot
Adds a Text Spot, a spot where only the name and description of the location can be set. A text spot is appropriate if you do not need to include a photo, but only a note or brief description of the location. Images can also be added later.
Spot with Image
Adds a Spot with Image, allowing up to 5 images in addition to the location name and description. Even if you have set up a spot as a text spot, you can change it to an image spot by clicking on the image icon in the lower left corner of the edit screen.
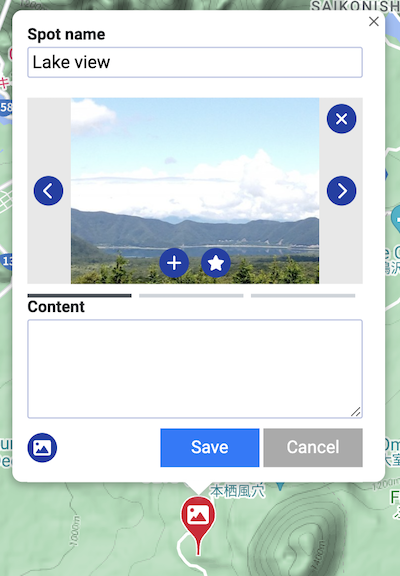
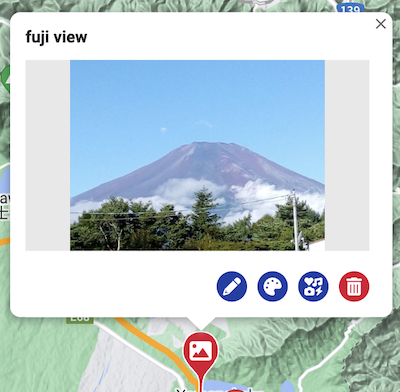
【Description of the buttons in the image】
Adds an image.
Deletes the displayed image.
Sets the currently displayed image to be shown first.
Images with EXIF (geographic information) can be automatically set as spots. Use the upload button below to upload files with EXIF.
If you upload an image without EXIF, it will not be set. Depending on your smartphone settings, you can set EXIF for images taken with the camera. Check your smartphone settings for details.
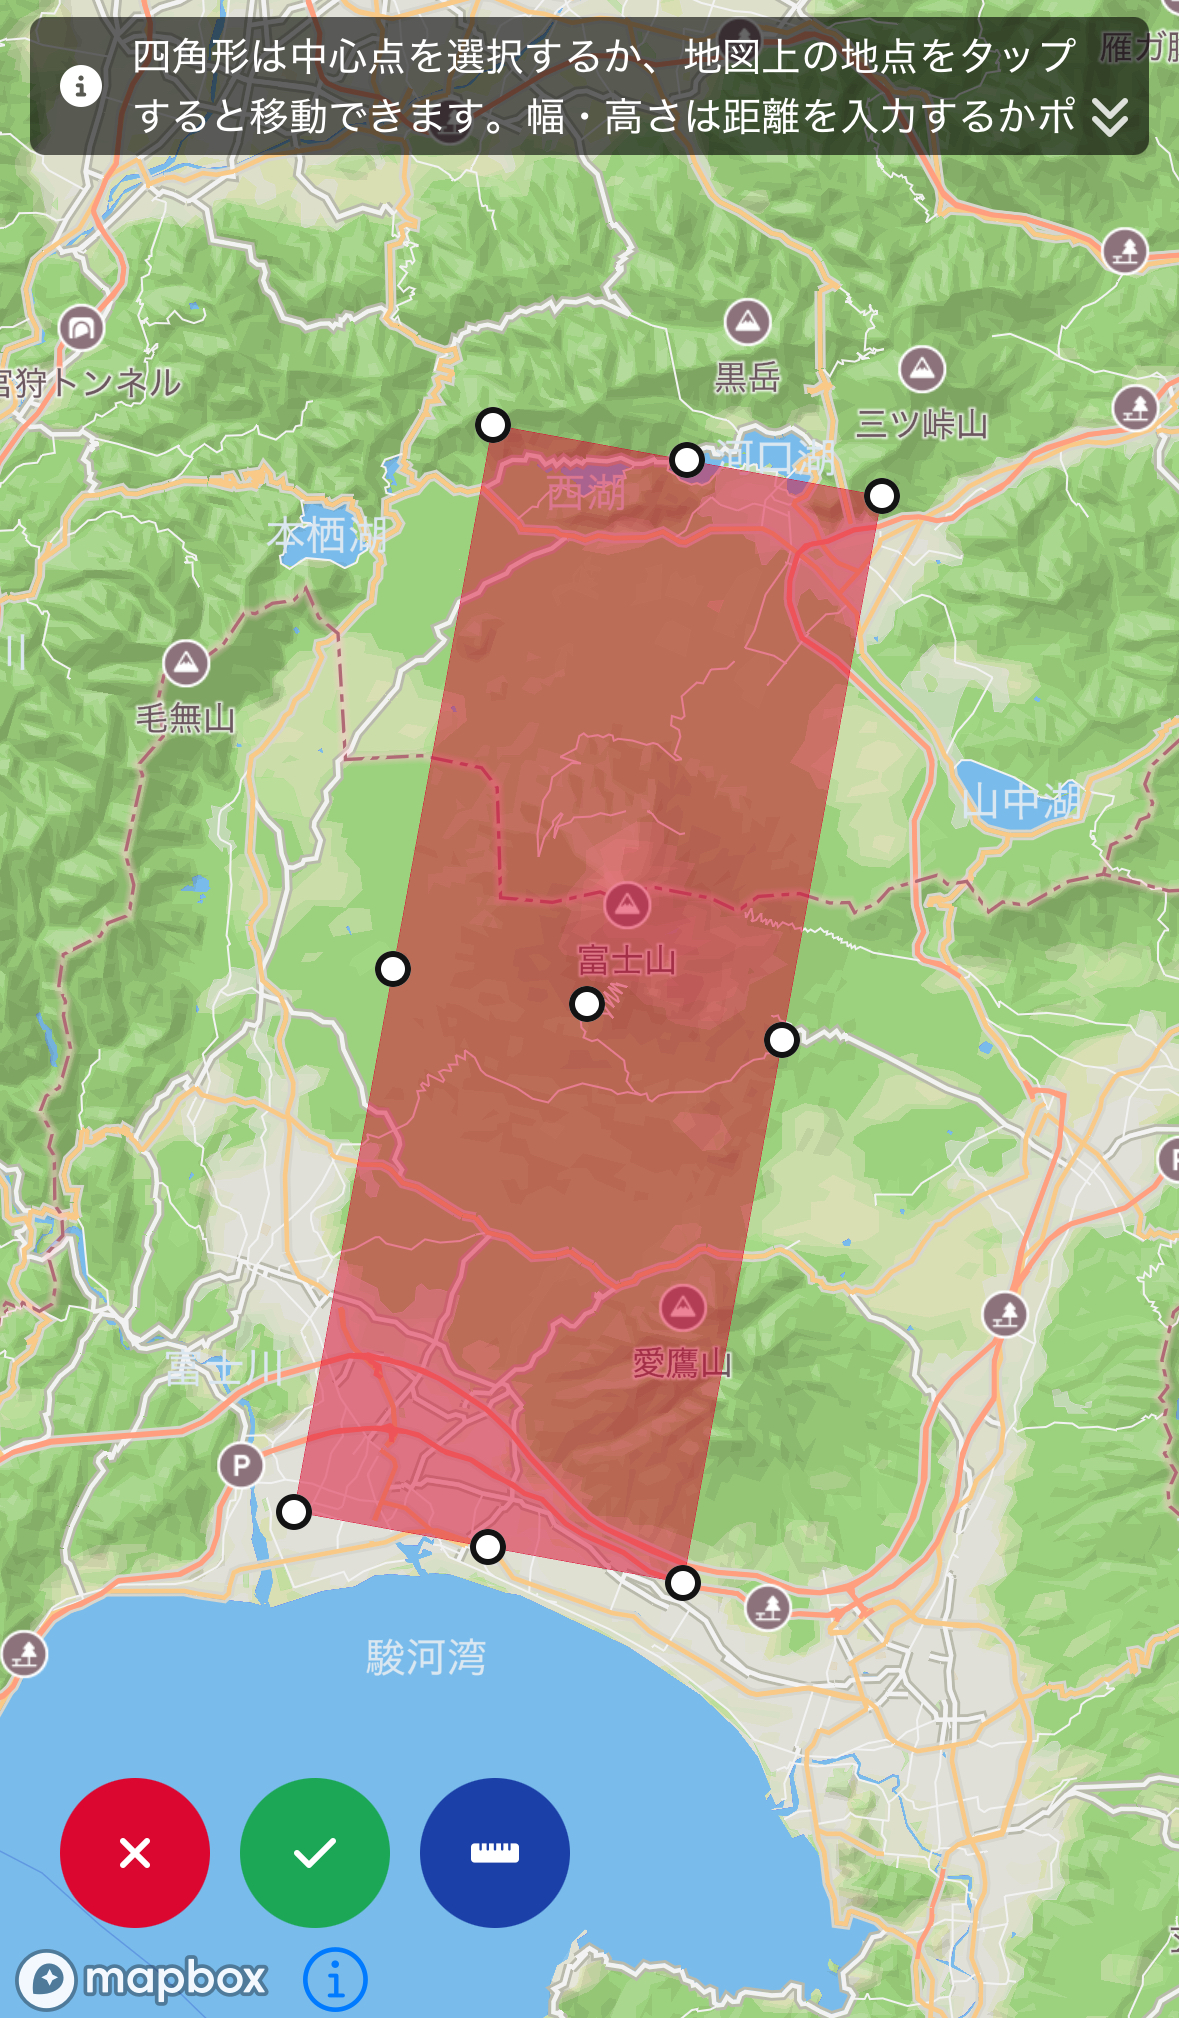
Shape
Adds a shape to the map. After clicking the button, select one of the circle, rectangle, or custom shapes.
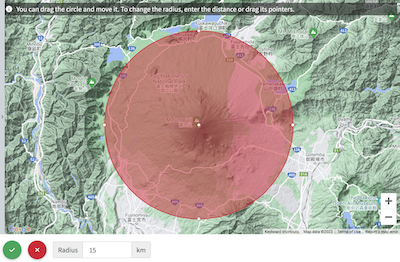
Circle
Adds a circle to the map. Initially placed at the center of the map, you can set the center at any location and freely change the radius. The circle can be moved by dragging.
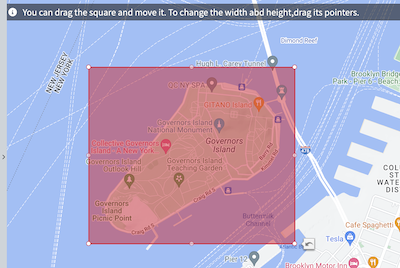
Rectangle
Adds a rectangle to the map. You can set any width and height. The rectangle can be moved by dragging.
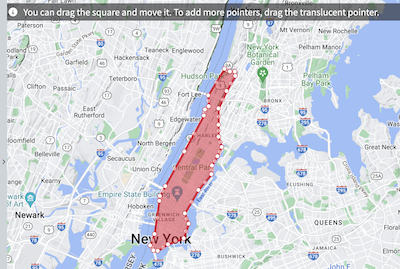
Custom Shape
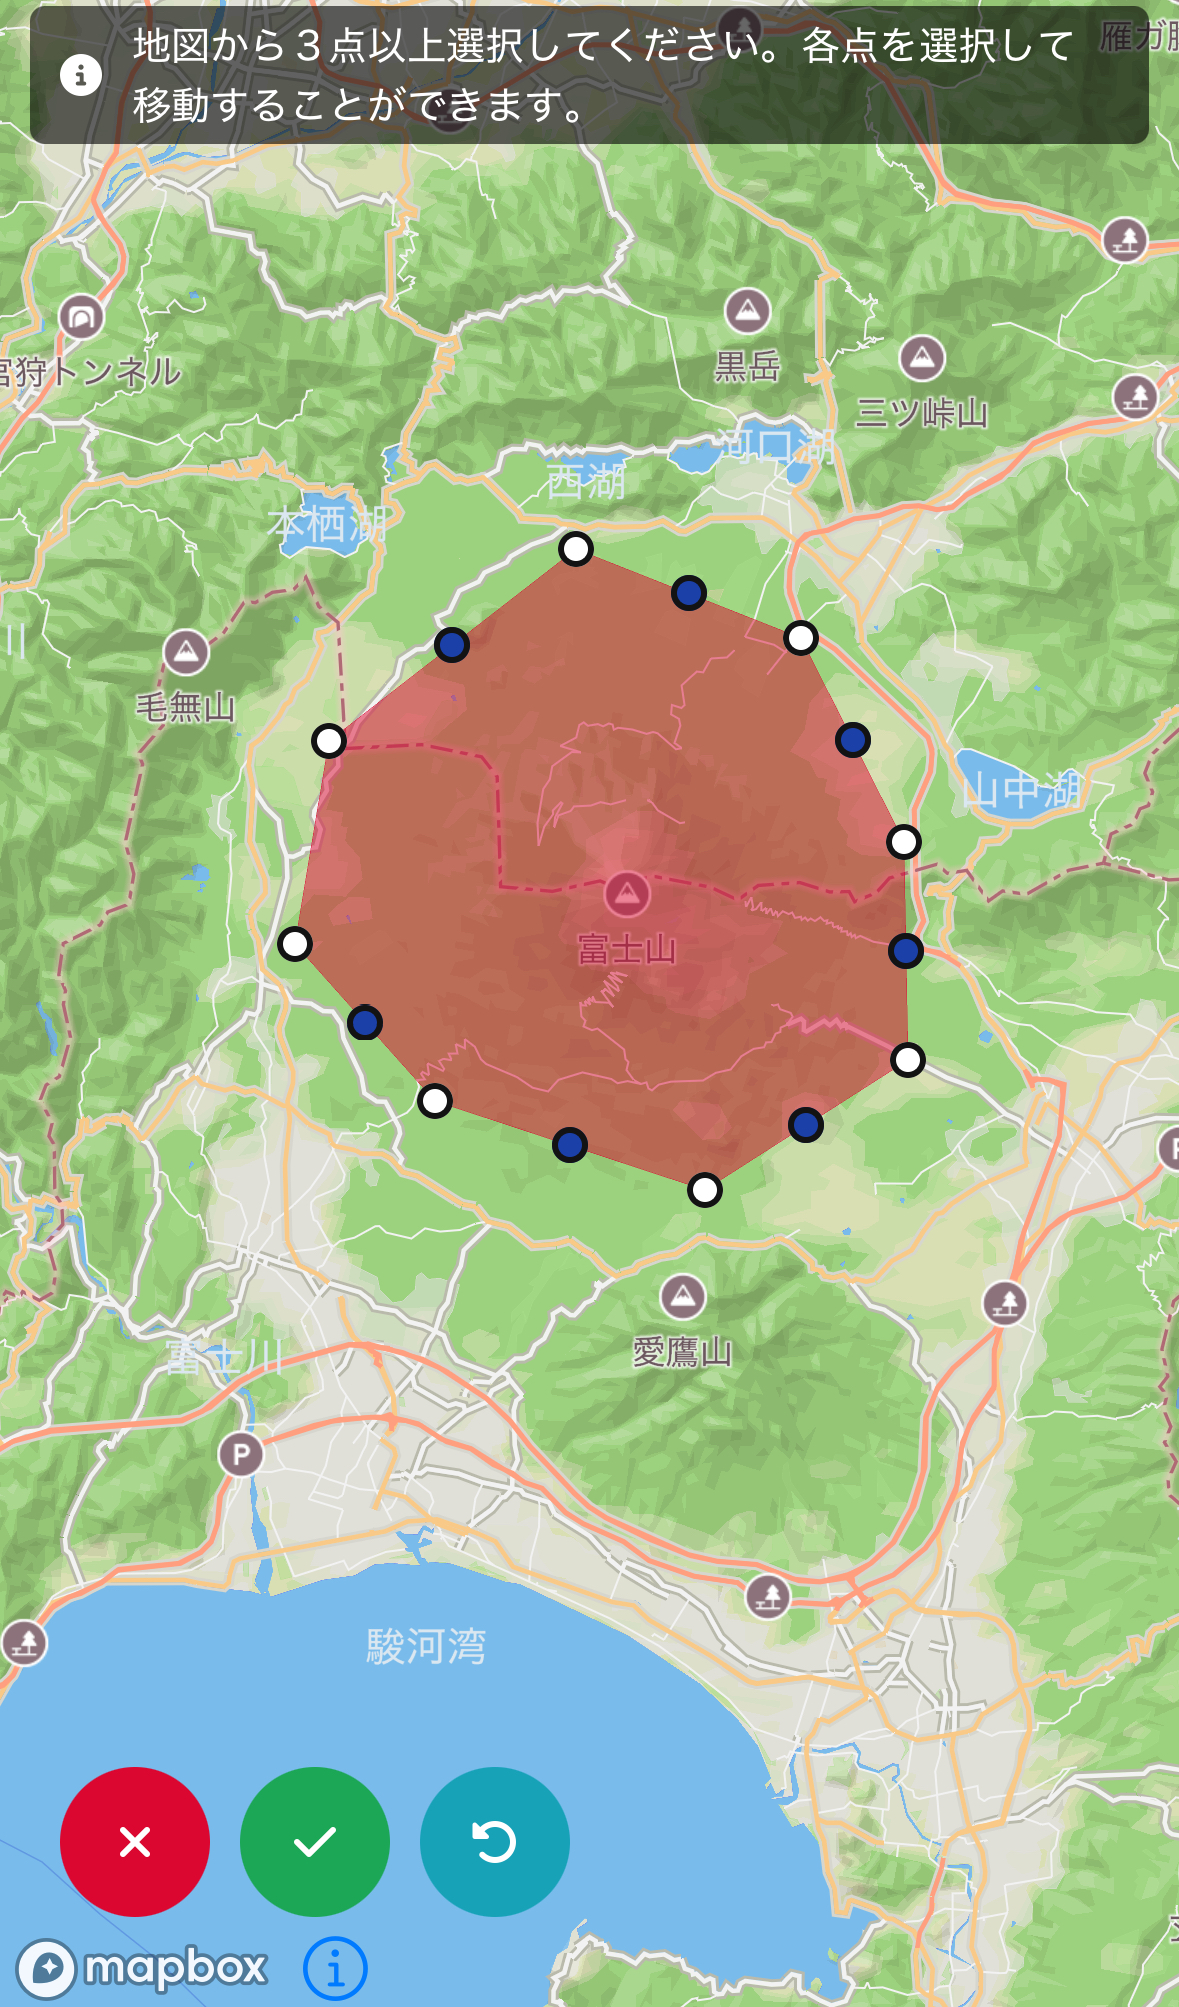
Adds a custom shape, allowing you to create complex shapes from three or more points. Click the starting point and add points to create the shape. Finally, click the starting point again or the OK button to close and fill the area. If the endpoint does not match the starting point, a line will automatically be drawn to the starting point. The shape can be moved by dragging, and the placement points can be changed or added later.
Geographic Search
Displays the search function. Enter place names or landmarks to move the map to the matching location. Use this feature when you forget the location.
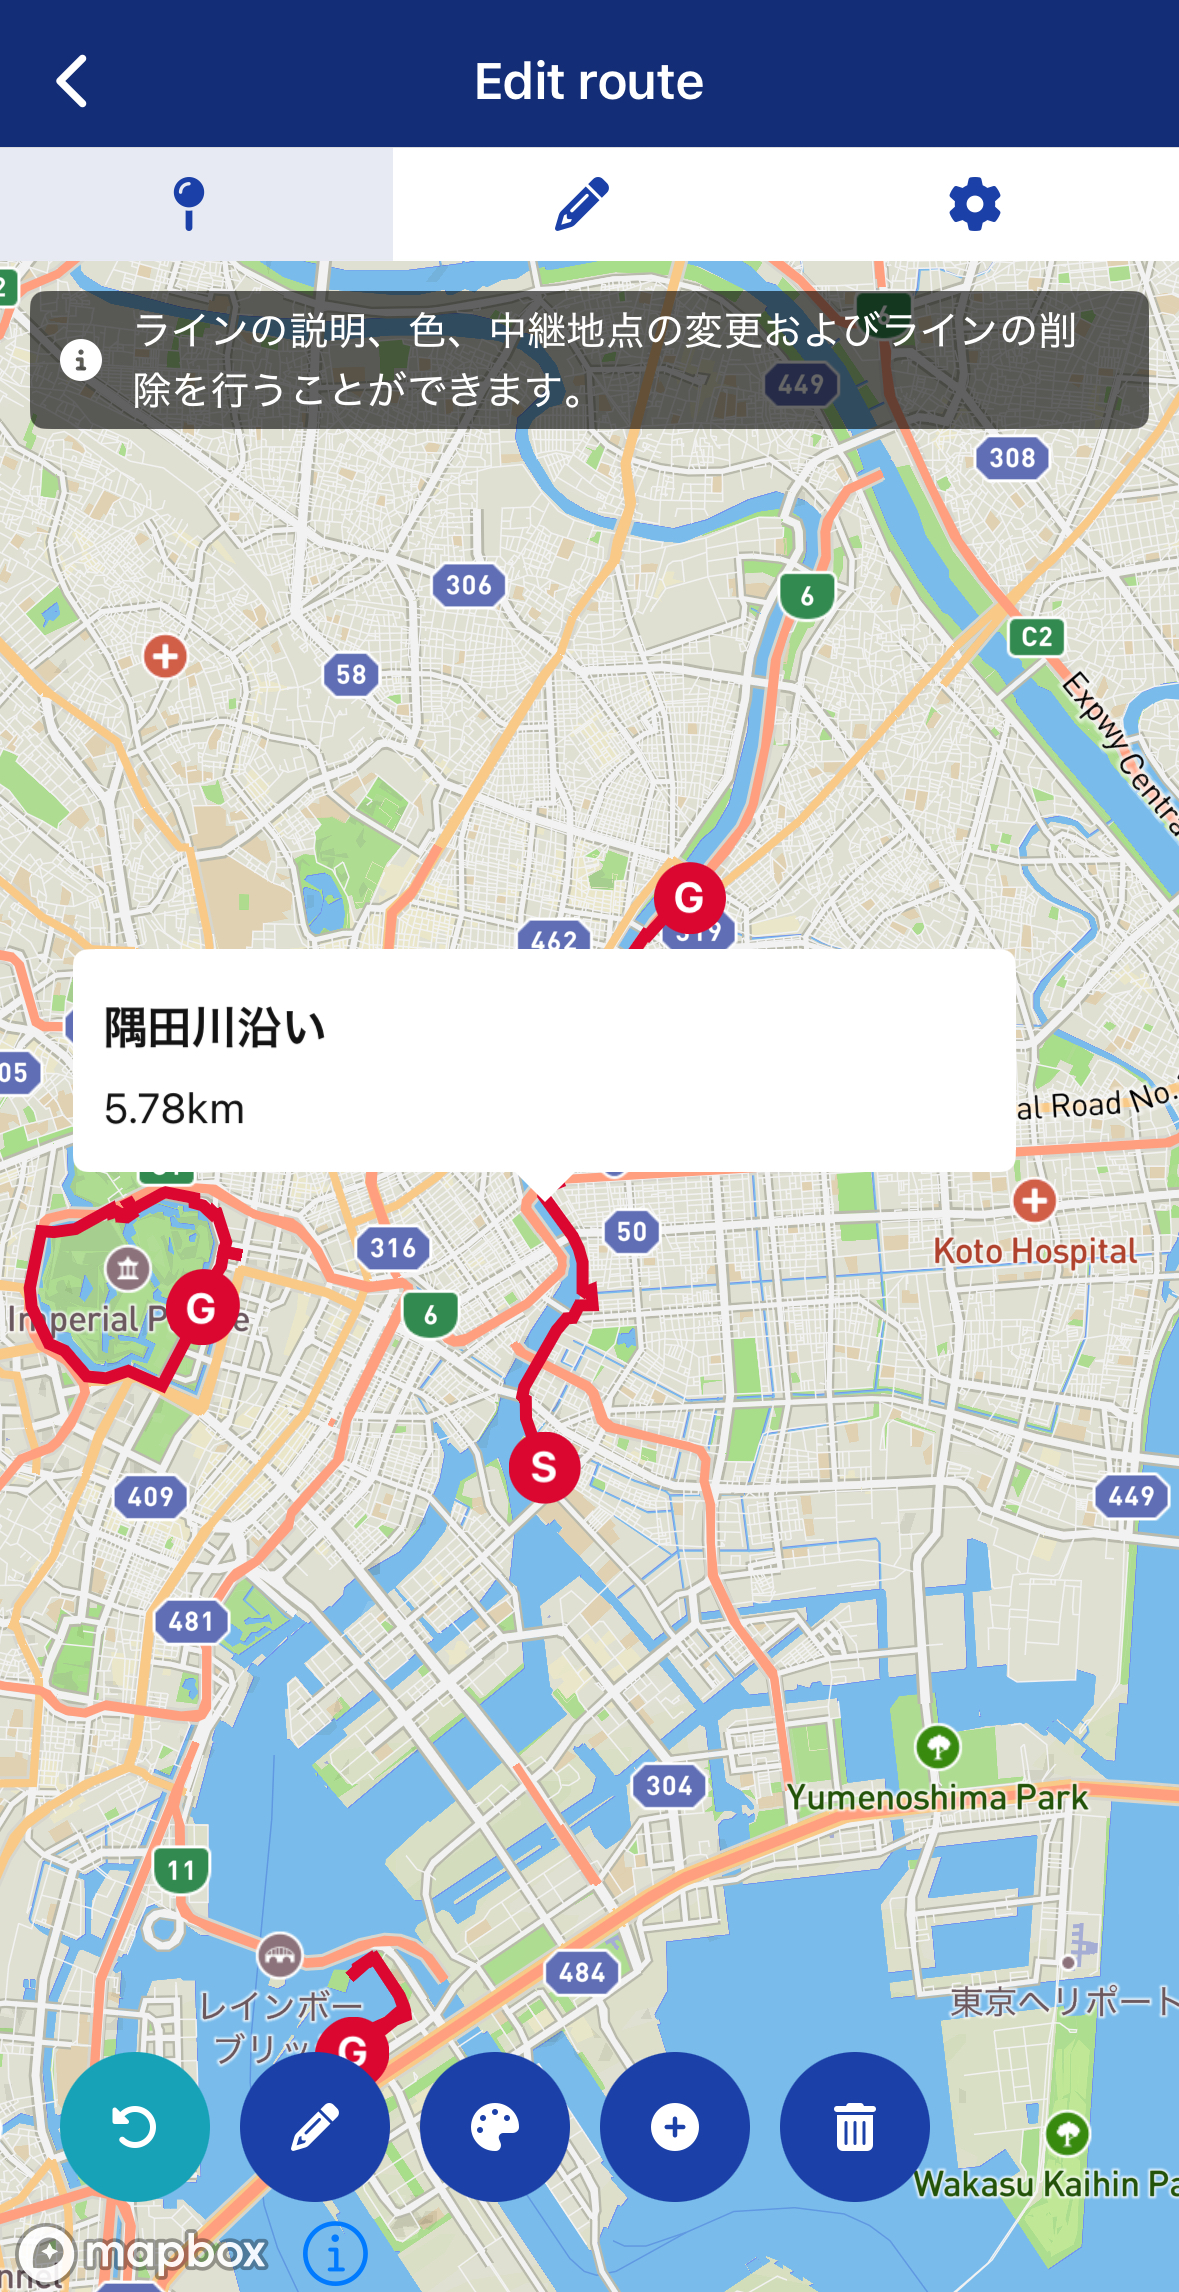
Re-editing Objects
Objects added to the map can later be edited for title, description, color, and position. To make changes, click directly on the object on the map or select the object from the layer.
Common icons are provided as shown in the image:
Edits the name, description, and image.
Changes the color.
Changes the icon.
Changes the line points.
Changes the placement points of shapes or moves them by dragging.
Deletes the object. A confirmation will be displayed before deletion.
How to Use Layers
- Added objects can be classified by layer. Open and close layers by clicking the layer button on the left side of the map (PC) or the layer button (smartphone).
- When adding objects, they are added to the selected layer. Change the selected layer by clicking the layer name (blue background area).
- Click the object name to display detailed information about the object on the map.
Changing Layer Names
Double-click the layer name (blue background area) or click "..." on the right side to change the name.
Changing Objects
Objects are added sequentially to the selected layer. To change the order of objects, drag and drop objects to change the order. To change the layer to which an object belongs, drop it into another layer area to change the layer itself.
Deleting Layers
To delete a layer, click "..." on the right side and select "Delete" to confirm deletion. Deleting a layer will delete all objects belonging to it, so be careful.
Next Steps
The explanation of the map function is complete. After adding objects to the map, create detailed content with text and images.
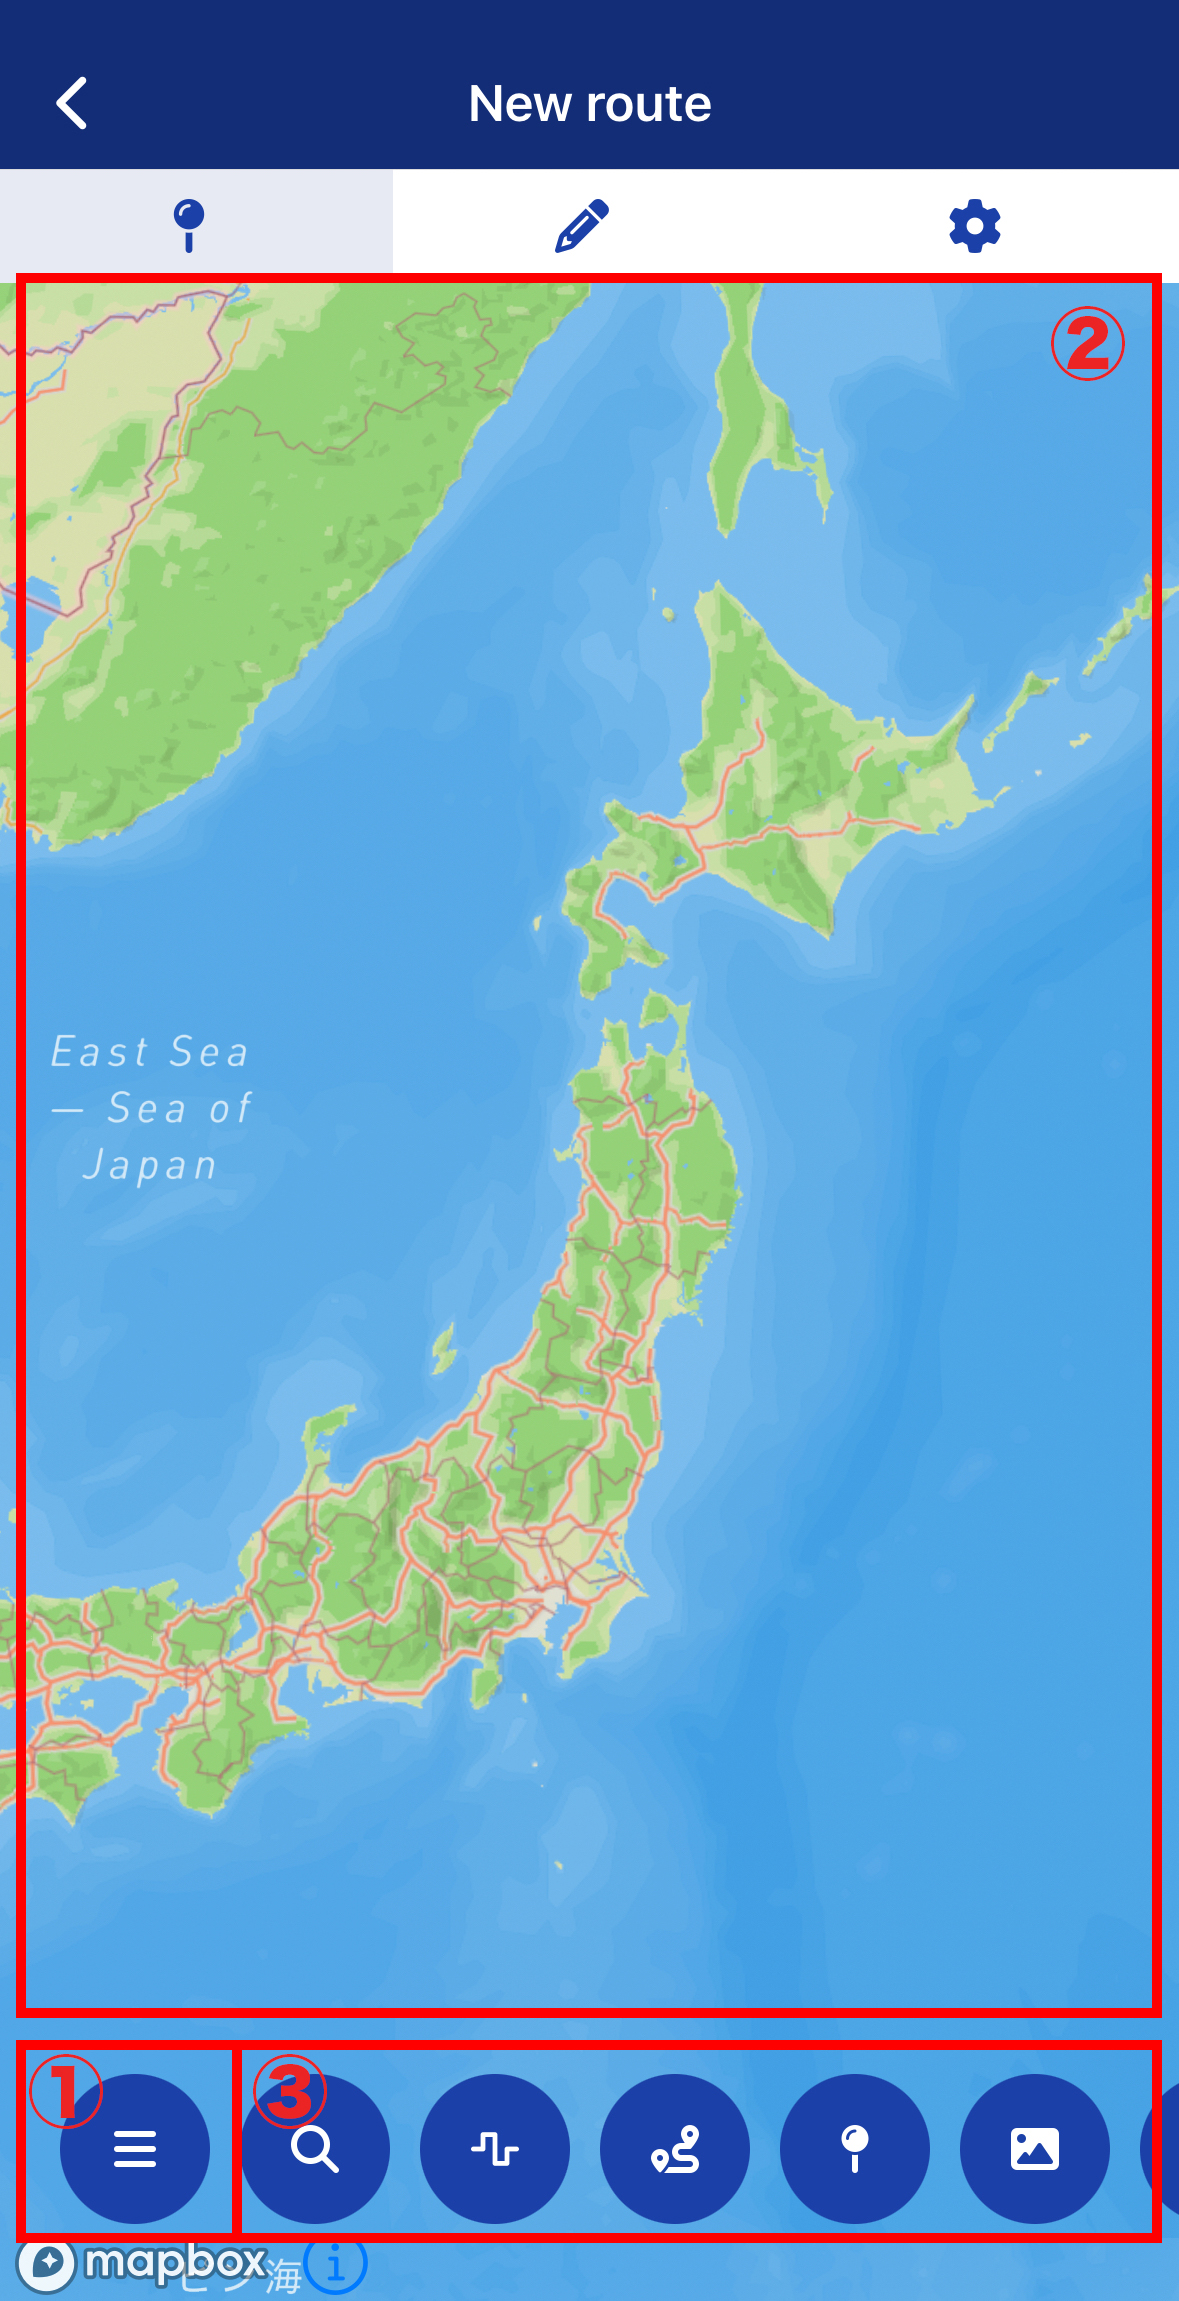
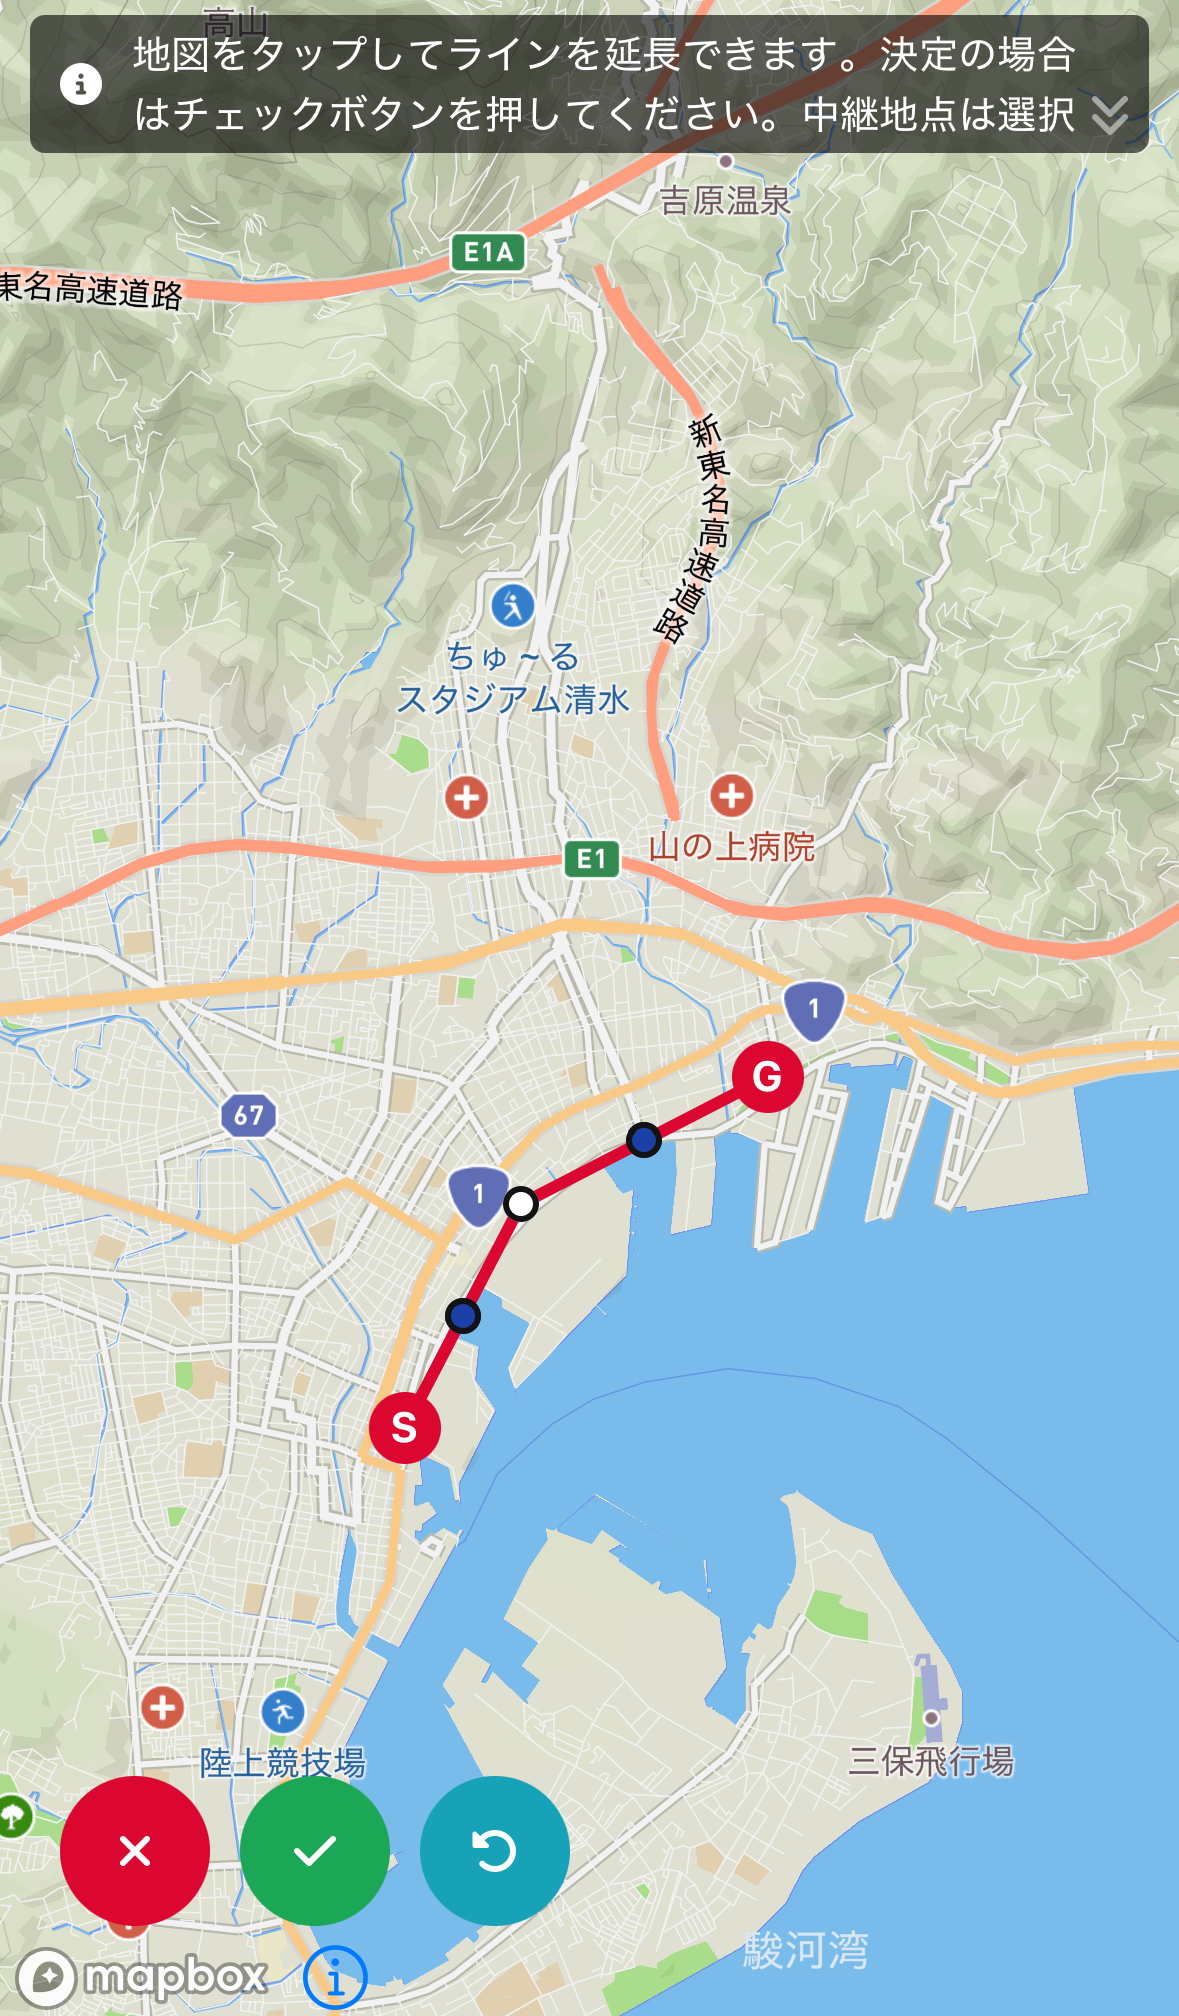
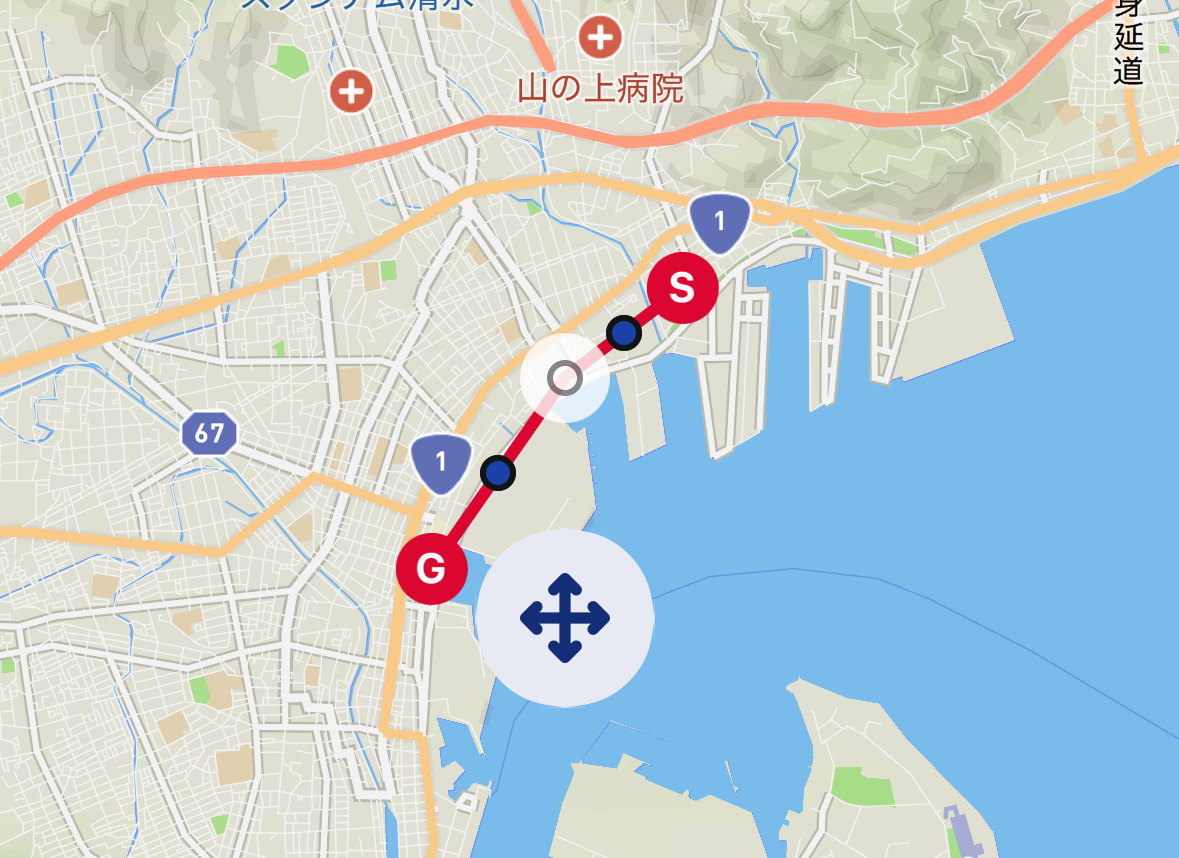
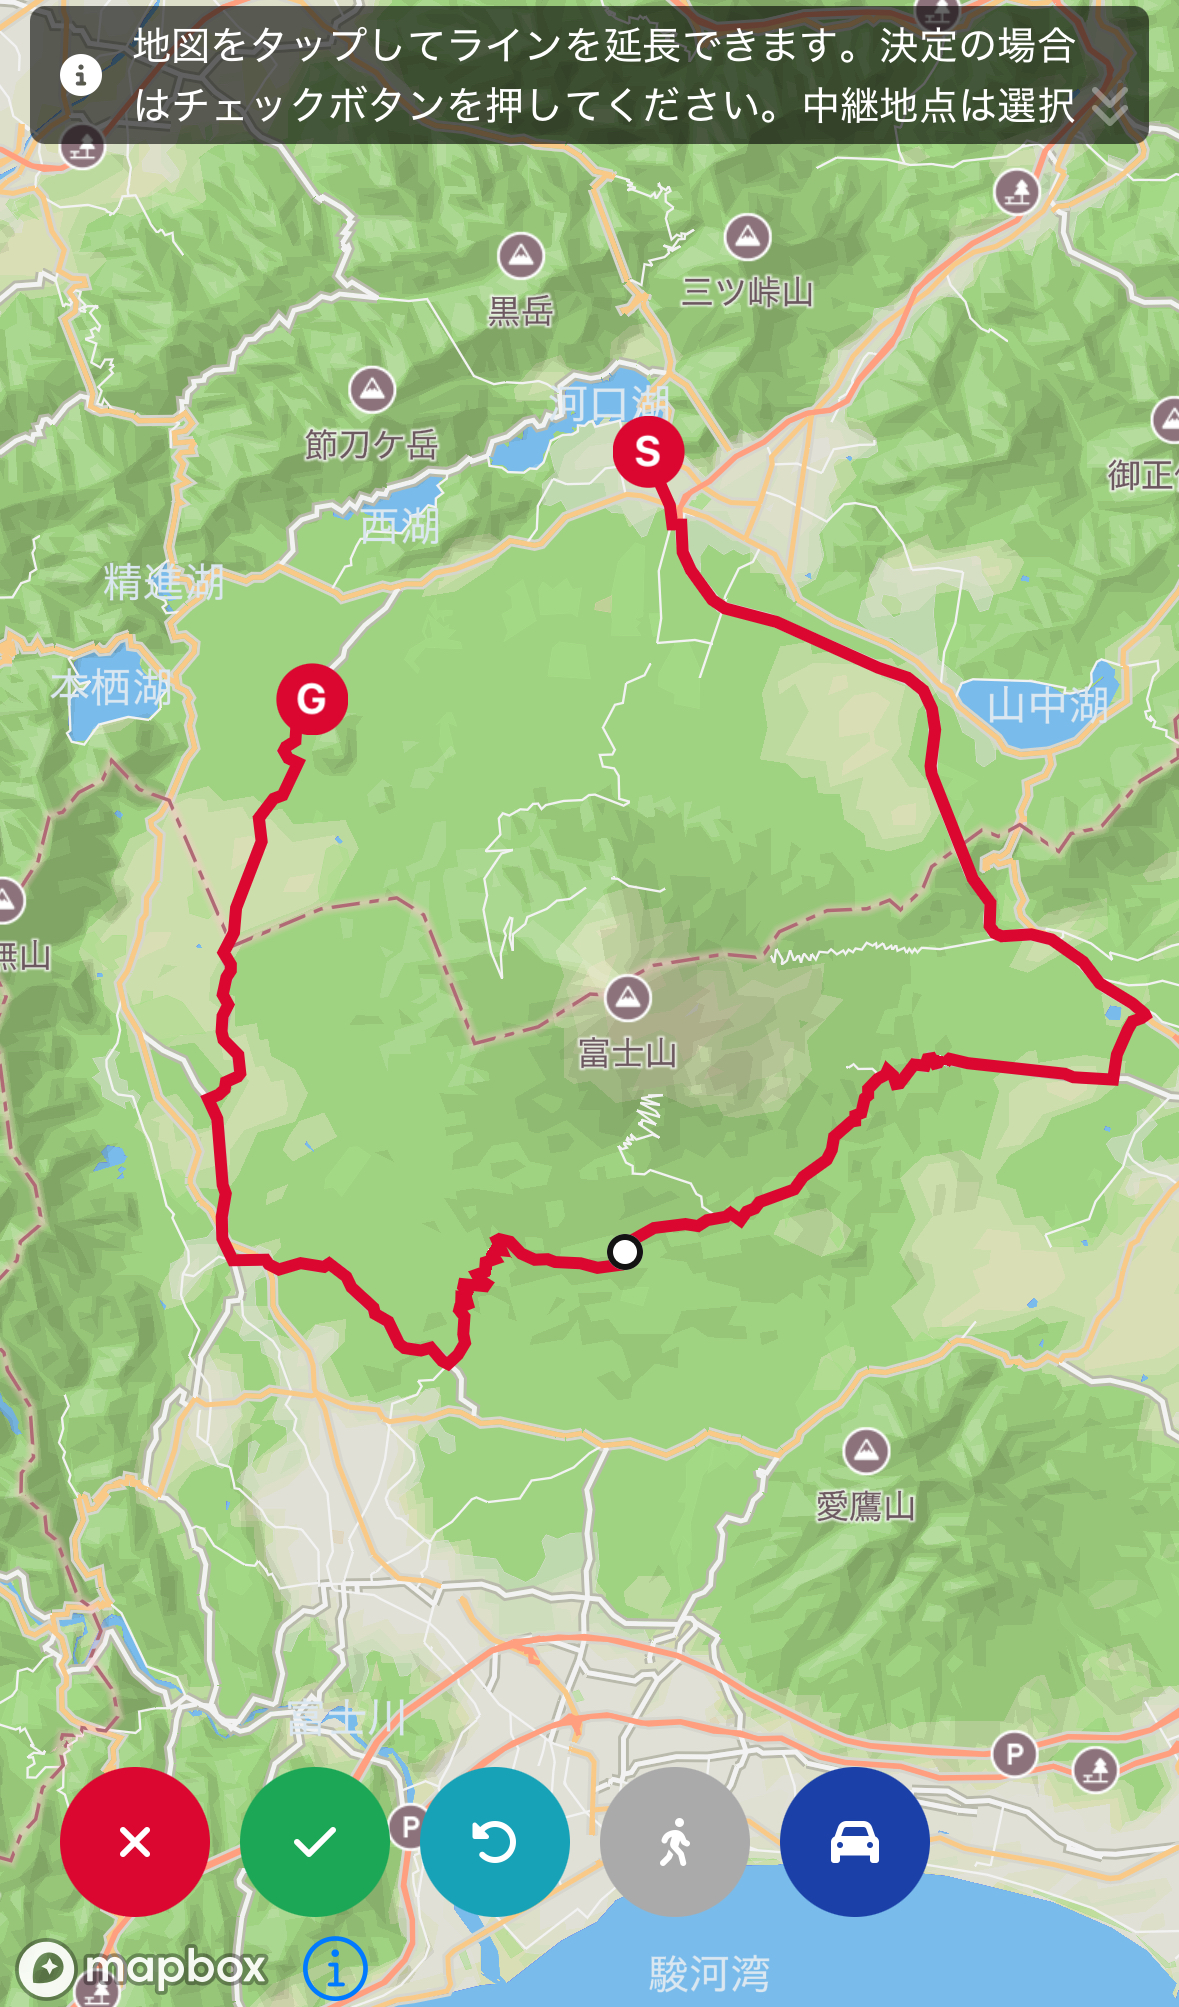
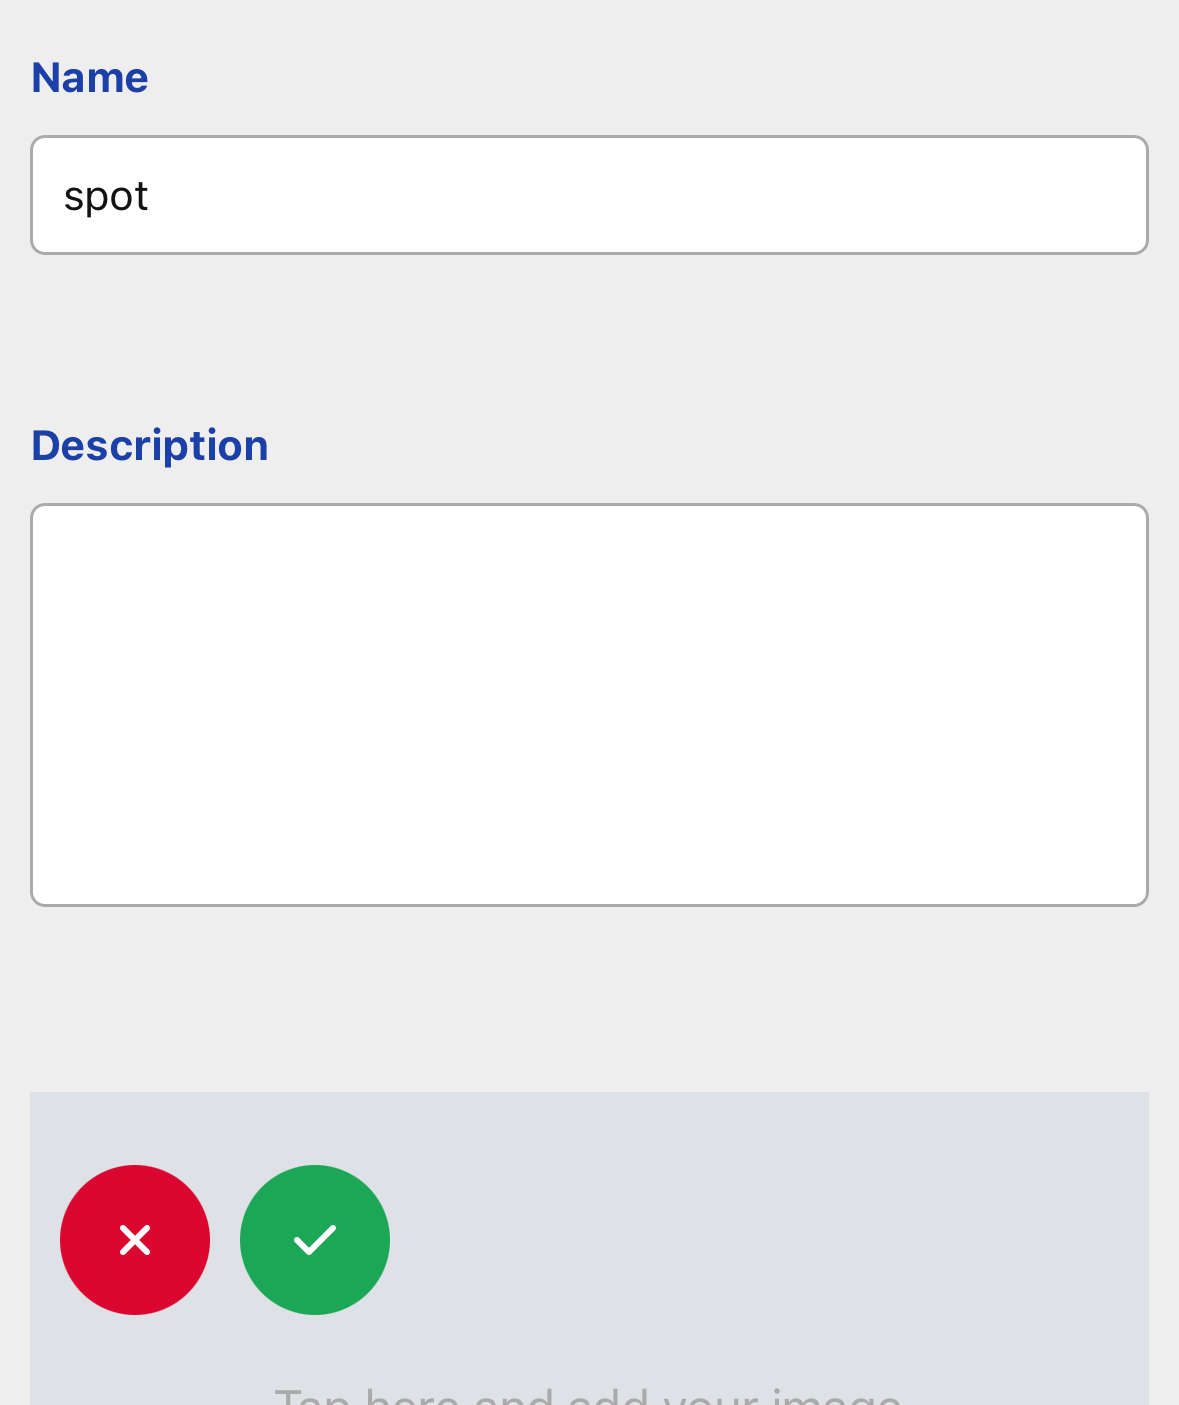
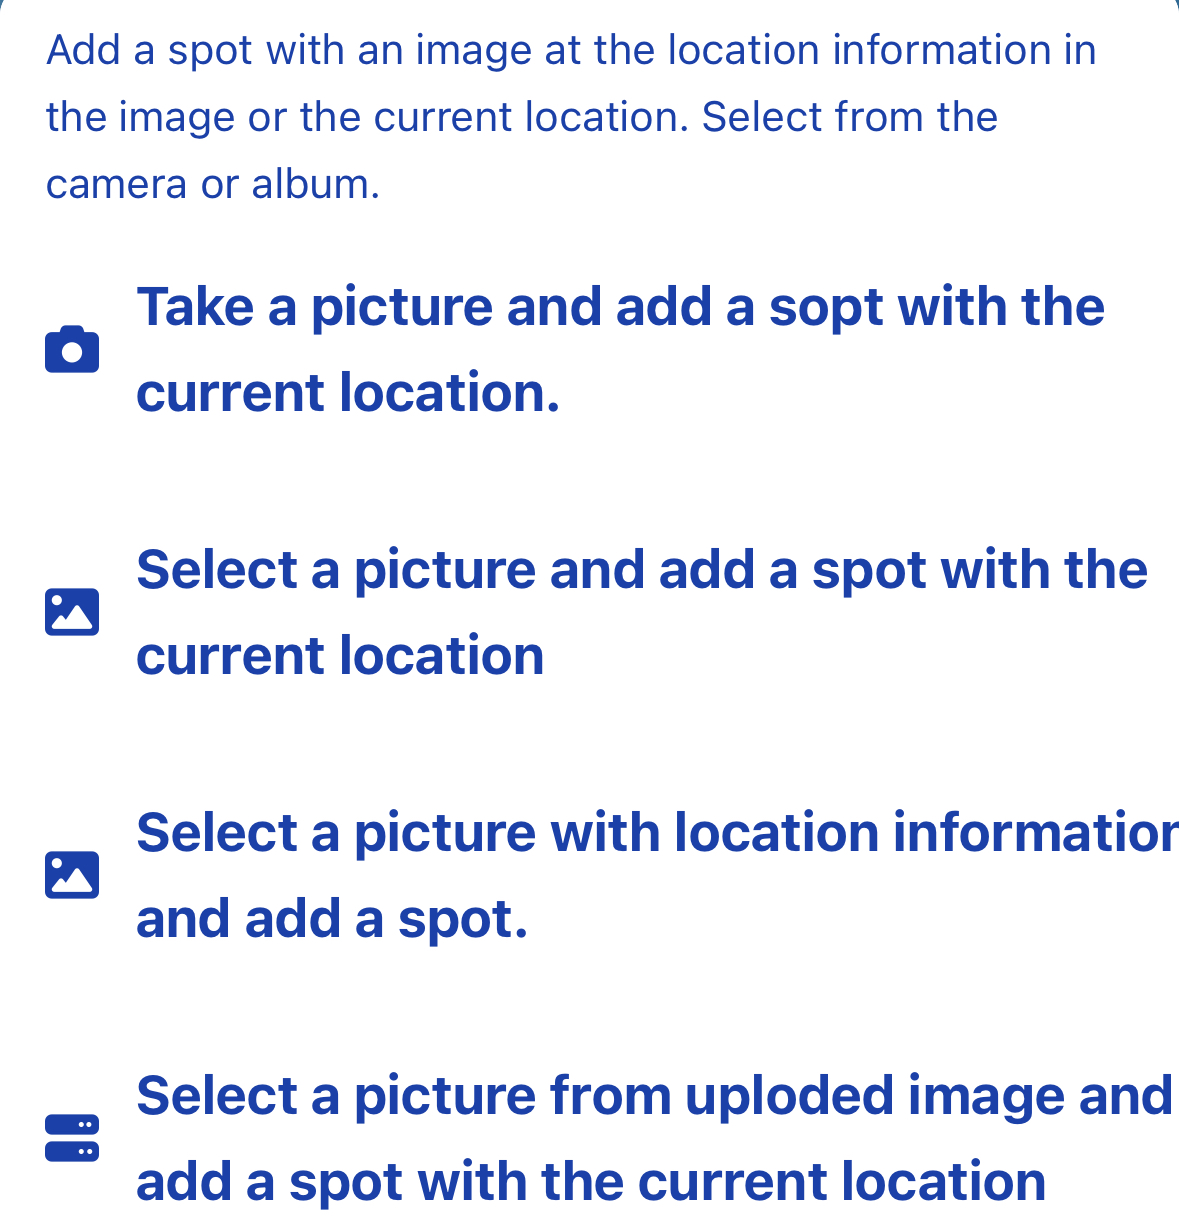 Image spots can also be automatically placed by reading the EXIF (geolocation) data from photos. To use EXIF, upload your images using the “Add from Album with Location Info” option.
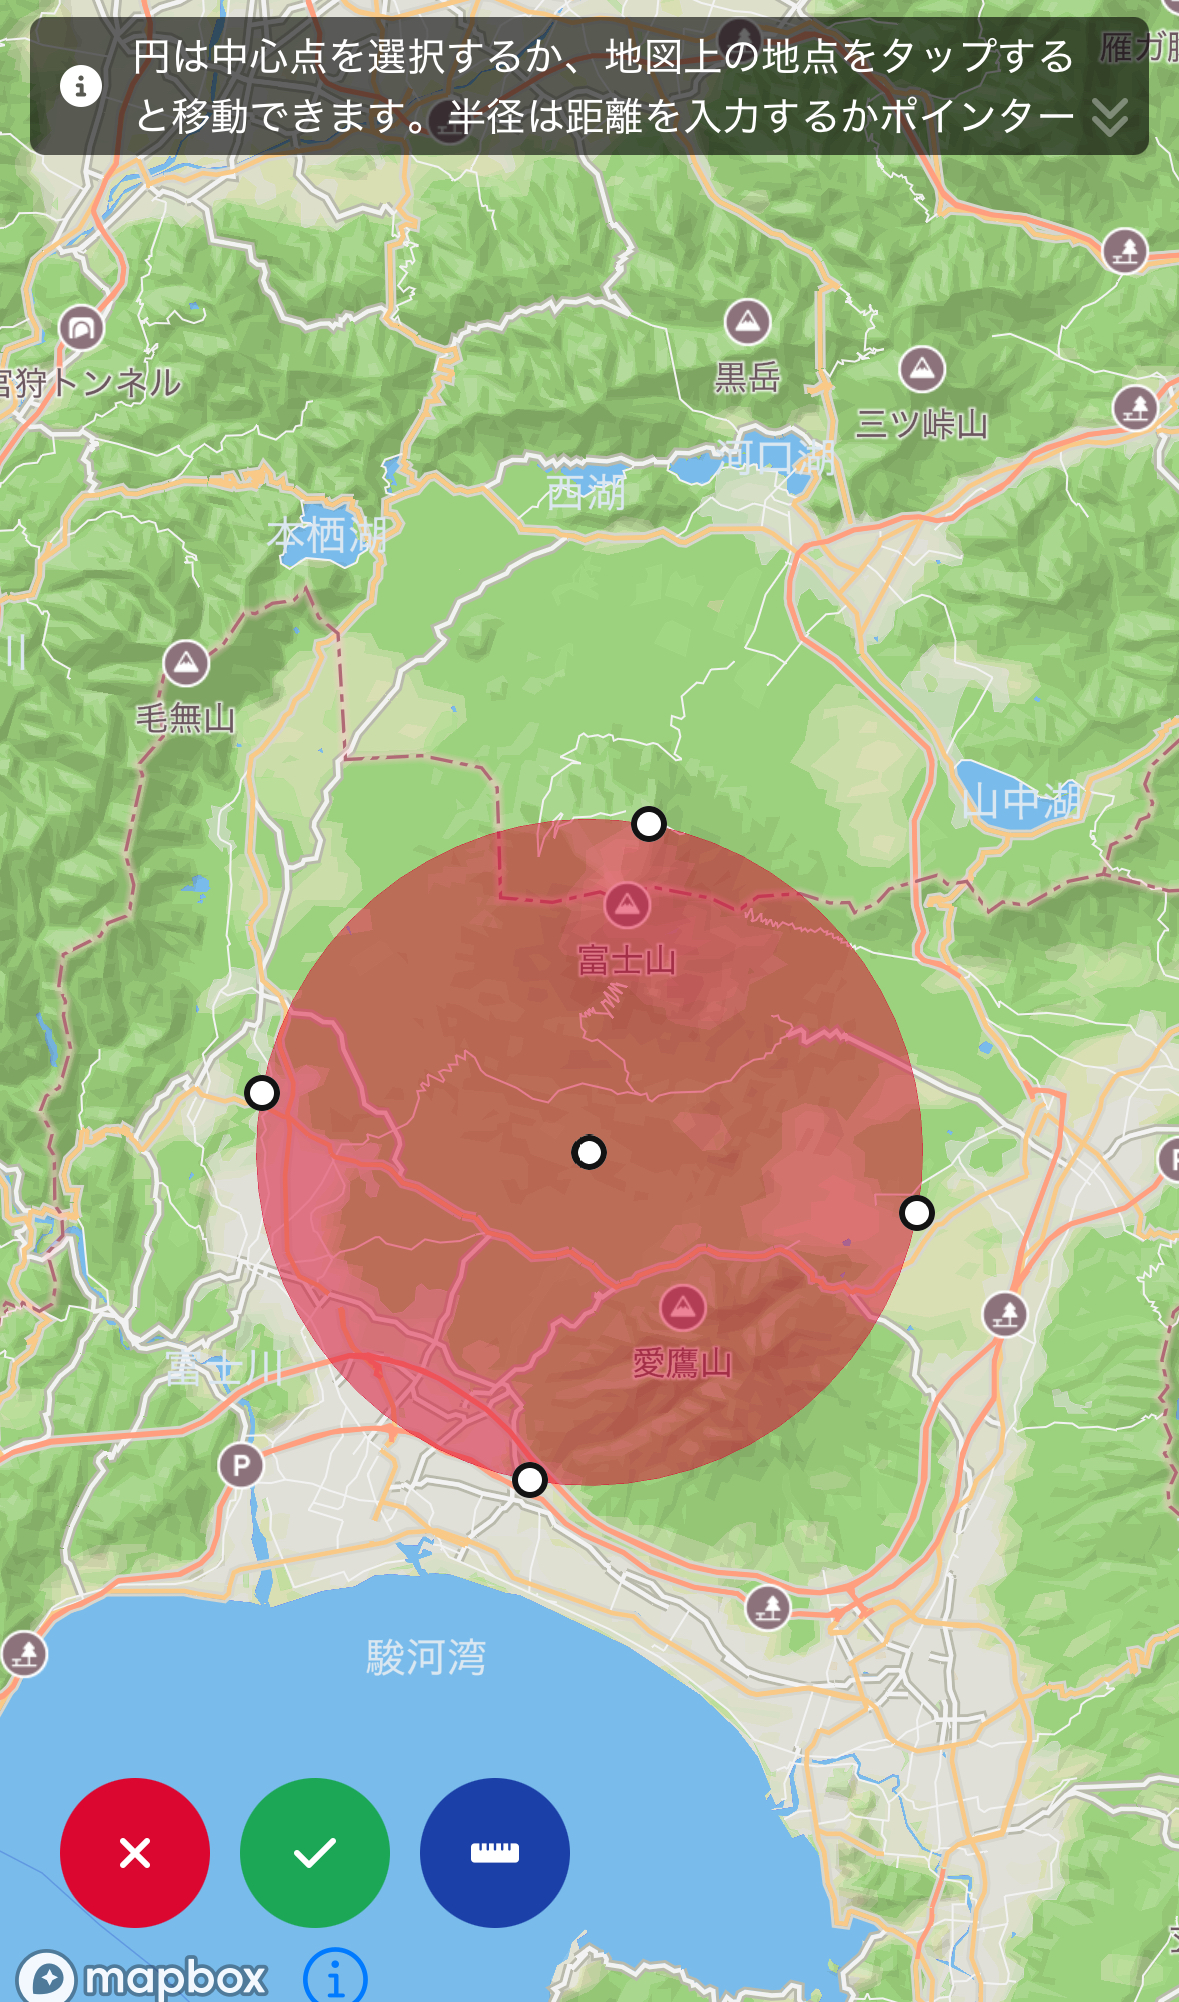
 Under normal conditions, a set of common icons appears at the bottom of the screen, as shown in the image.